
Creating with Chalk Couture is so fun and super easy, but getting started can be intimidating. Let this Ultimate Guide for Chalk Couture Beginners help you out! Maybe you landed on the Chalk Couture website and got overwhelmed looking at all the options. Or you’ve been trying to decide what project to create first and can’t get past picking a stencil. You’re in the right place now!

With so many choices, from stencils, to surfaces, to paste colors, it’s totally normal when you are new to Chalk Couture to think it’s all too much and you don’t even know where to start! This Ultimate Guide for Chalk Couture Beginners is designed to help with the overwhelm! You can pick a project kit or put together your own kit with the supplies you need to create your first project. The guide will help you understand the basics and tools that will make your chalking journey a success!
There is a lot to share with you, but we’ll take this beginner’s journey in small steps! You’ll find information on kits for beginners, the basics everyone needs and tools that can help with the job, but you can also find deeper dives on each of the individual topics in related blog posts!
As an overview, the basics you need for any Chalk Couture project include a stencil, a surface, some chalk paste and a squeegee. There are also a plethora of tools that can make the job easier, but they are not required. We’ll go over the tools available and great substitutions you probably already have laying around your house!
Ultimate Guide for Chalk Couture Beginners Options
It’s now time for your first choice! There are two ways to go when you want to try Chalk Couture – a curated Try Me Kit or a Build Your Own Kit.
Options:
Try Me Kit
The Chalk Couture Try Me Kit is an excellent way to get started! You get everything you need to create a finished project. Once you get your kit, all you have to do is follow the instructions that are provided for you!
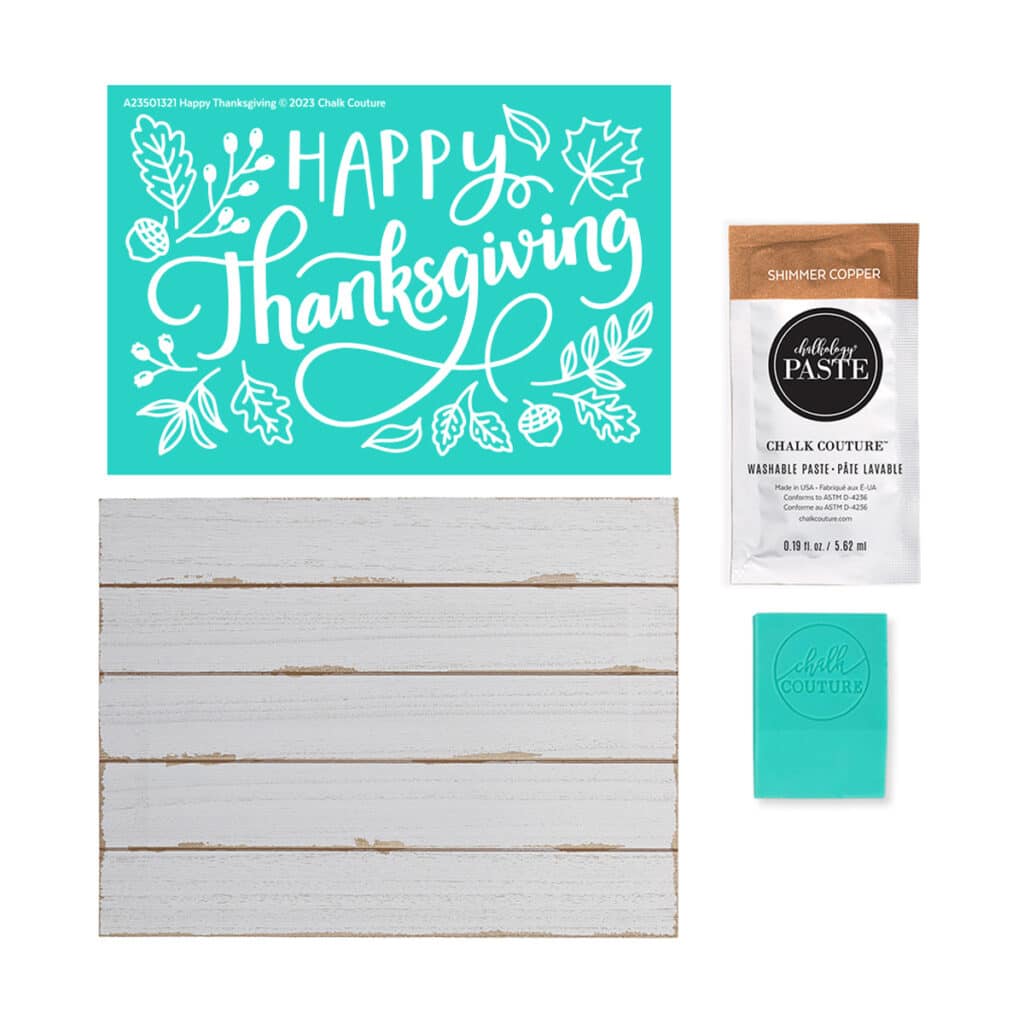
These kits change on a monthly basis and are typically seasonal in nature, but they also serve as great inspiration if you want to build your own kit at any time! Your kit includes:
- a 5” x 7” stencil,
- a coordinating surface,
- two coordinating paste packets,
- a mini squeegee.
Happy Thanksgiving is the current Try Me Kit. This complete craft kit includes the Happy Thanksgiving stencil design, shiplap sign (5″ x 7″), Chalkology® Paste Single in Shimmer Copper a Mini Squeegee.

You get all of this at 20% off the retail price! The upside is you get a discount, and you don’t have to make any decisions except whether you like the kit or not! The downside is that you cannot customize it.
In addition to the Try Me Kit, you may want to add another 5” x 7” stencil to your cart. Most of the surfaces included in a Try Me Kit can be used on both sides, and you’ll have more than enough chalk paste left in your packets to chalk at least one more project!
Since you can reuse your stencil about 10 times and chalk on just about any surface, you can keep right on chalking after you finish your project!
If this kit sounds perfect, let’s go shopping!
Build Your Own Kit
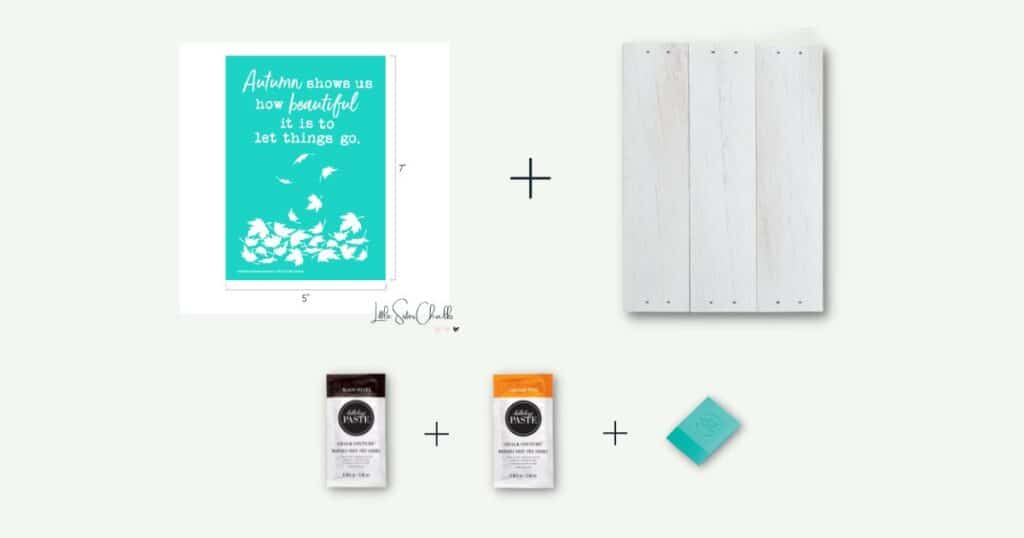
Give chalking a try with a kit you can build yourself! Customize your chalking adventure with the basic things you’ll need to create an awesome project – a stencil, a surface, paste and a squeegee.
This is an example of the basics you should put in your kit.
The ultimate goal is to get you off to a good start and alleviate the overwhelm! So let’s go through the must-haves at a high level:
- Pick a stencil (aka transfer) design – this might be the hardest step since there are so many stencils to choose from in a wide variety of sizes! Chalk Couture has 5 stencil sizes, but great choices when starting out are either the 5″ x 7″ (A Sized) or the 8.5″ x 11″ (B Sized) stencils. They are easy to work with, so choose your favorite design or two! See the Chalk Couture Stencil Guide for more details about stencils.
- Pick a surface – while you can use Chalk Couture on just about any surface, I recommend starting with a Chalk Couture reusable surface. For a 5″ x 7″ project, the most popular surface is the Board & Base, but there are different options depending on your style. There are lots of great one-time use surfaces like wood, metal and textiles as well. Check out the Chalk Couture Surface Guide blog post for all the details.
- Choose some paste colors – Chalk Couture has 50 paste colors to choose from including a glow in the dark paste! It can sometimes be really hard to make a choice here! See the Chalk Couture Paste & Ink Guide for more details and questions to consider when choosing a color. To help make it a little easier, here are a few things to consider in this step:
- Your decorating style and color scheme
- Your current home decor
- The size of your project will help you decide whether you should pick a jar or paste packets. Note that not all paste colors come in both jars and packets, so this might impact your decision as well.
- Paste single packets are a great choice when you are getting started! You get a good amount of paste that can be used for a couple of projects, and the best part is that you can try different colors to see what you like best. You can also save the paste you don’t use for your next chalking adventure!
- If you know you will be creating a lot of Chalk Couture projects, you can’t go wrong with a jar of black or white paste (depending on your surface choice). Jars are 3 U.S. fluid ounces and will carry you through many chalking creations!
- A squeegee – Squeegees come in a variety of sizes, but there are two basic sizes:
- The mini squeegee is always in my hand! This is an easy-to-use size and works on any size project. They are the perfect size for dipping into a jar and to use with a color tray when you are using paste packets.
- The small squeegee is great if you are doing one color. It’s slightly bigger than the mini but can be used on just about any size project.
| Want an easy way to track your choices? I have just the tool for you – a downloadable pdf that outlines all the choices you need to make to get off to a great start with your Chalk Couture project! Get the Ultimate Checklist here! |
Tools
Having the right tools on hand always makes the job so much easier! There are several things that are useful to have on hand when you start chalking, but the only thing you really need to make sure you have is a squeegee! Check out all the available tools in the Guide to Chalk Couture Tools blog post.
Below is a list of helpful tools, but remember you don’t need to purchase a bunch of tools to get a great result!
- The multi-tool does double duty. It has tools at both ends. One end is a very small squeegee that lets you get at smaller, more intricate parts of a stencil which is especially useful when using more than one color in your design. The other end is great for stirring and mixing your paste.
- Stir stick (or popsicle stick) – this little tool helps you stir your jar of chalk paste, but if you are purchasing singles, it’s not as useful. It’s also great for scooping paste when you want to mix paste colors to create a customized color. But you can use a popsicle stick or really anything you have on hand that would make a good stirrer!
- Fuzzing cloth (or towel, tshirt, etc) – this tool helps to reduce the stickiness of your stencil. This may sound counter-intuitive, but if your stencil is too sticky, it will be hard to remove from your surface and may get damaged or stretch if you need to pull too hard when you are removing it from your surface. You can use any towel, microfiber cloth, or even your clothes! I tend to use the fuzzing cloth because there’s always a stray dog hair, or several hundred, on my clothes!
- Board eraser (or magic eraser) – this helps with clean-up of both stencils and surfaces. When cleaning your stencils, make sure there is no paste left in the mesh silk screen. If paste stains the teal part of the stencil, it will not cause any harm. The board eraser will help reduce the amount of stain and can help remove any ghosting on chalkboard surfaces.
- Detail tool (or toothpicks) – the Chalk Couture detail tool has two useful ends – a tiny squeegee end for detailed paste application on intricate parts of a stencil and a pointy tip that can help with fixing small mistakes or lifting the corner of your stencil from your surface. Toothpicks are also very good helpers to have on hand for those little things that may need fixing!
- Q-tips are good to have on hand to help with any smudges or mistakes especially on reusable surfaces.
- Paper towels are helpful for cleaning your fingers, cleaning excess paste off of squeegees and other tools before you wash them, and for setting aside tools as you use them.
- Water can be used with your Q-tips and paper towels or to clean your fingers if you get paste on them!
- Clorox or cleaning wipes can be used in the same way as your paper towels. They can also be used to clean your stencils. You should never use baby wipes on your stencils, surfaces or tools as they can leave behind oils that could harm your products.
- Color trays (or dollar store mini appetizer plates) – these can be used to hold your paste when using paste singles or for creating a unique color when you mix paste colors.
- Something to store leftover paste in from paste packets. Some ideas are contact cases or small paint pots that you can find at any craft store.
- Quick Dry Tool (or a hair dryer) – this tool helps you dry your paste faster and is especially useful if you are layering stencils or are in a hurry! Paste dries pretty quickly, but shimmer colors can take a bit longer to dry. I am notorious for sticking my fingers in wet paste, so I make good use of my Quick Dry Tool!
- Placement Tape (or painter’s tape) is useful for marking off areas you don’t want to chalk if you are only using a specific part of a stencil. It can also help with alignment and ensuring designs are straight.
- Transfer Trimmers (or any kind of scissors) to use on cut-apart stencils.
Phew! That must have felt like a ton of information!! Thanks for sticking with me! To summarize, pick:
- a stencil (or two),
- a surface,
- some paste colors,
- and a squeegee!
This is a lot of information and maybe it still feels like way too much! I can offer one more thing to help make this even easier for you – a Customized Cart Link!
- Contact me and tell me what stencil and colors you are interested in.
- I’ll send you a link that has a shopping cart populated with your stencil and paste color selections plus suggested surfaces, tools and coordinating products.
- You click the link, add and remove products as you wish, and finish shopping!
A cart link is an easy place to start that can be further customized to your preferences and budget, and it might be just what you need to relieve that overwhelm.
You are now off to a great start with the things you need to create your first project and multiple projects! You’ll be able to reuse your stencils, your paste, your tools, and maybe your surface depending on what you chose! When you’re ready to create something new, you’ll know exactly what you need!
I hope you found this Ultimate Guide for Chalk Couture Beginners useful to building your first project! I can’t wait to see what you create!
Luana