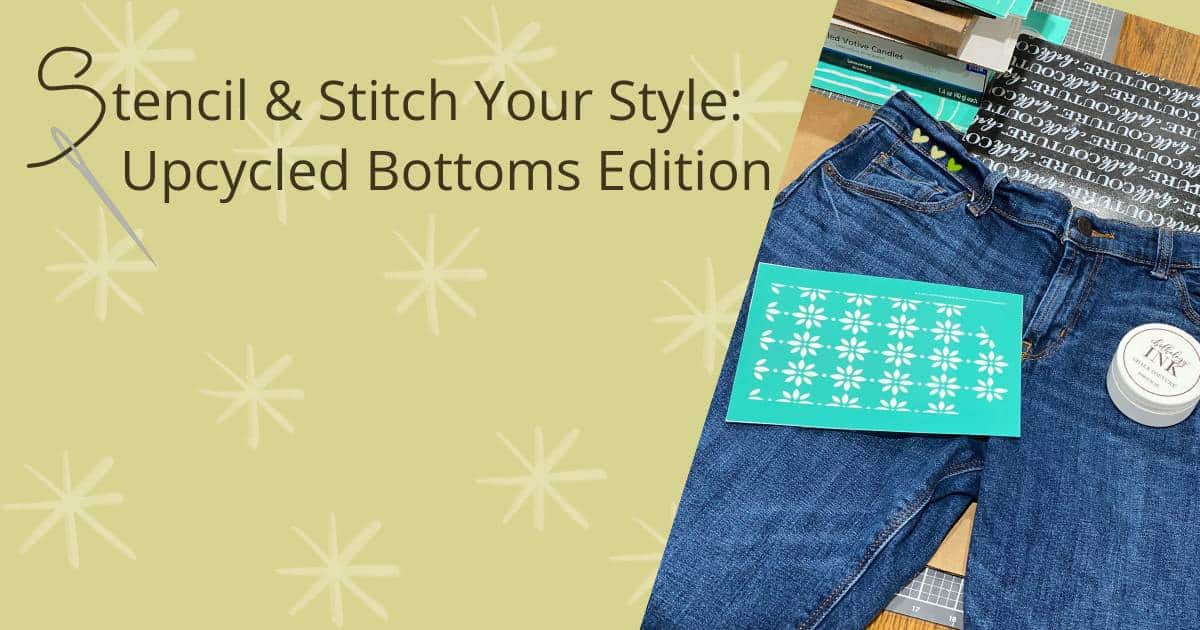
Breathe new life into your well-loved clothes with stencils and embroidery! Upcycled bottoms are a fun way to add some personality to your wardrobe. You can add small or large designs in a number of different places like pockets, hems or along the legs of your pants.
Ideas for Upcycled Bottoms
Using Chalk Couture products to add something fun and unique to your pants is incredibly easy! There are so many different stencil designs to choose from but some favorites include florals and patterns.
Chalk Couture is coming out with embroidery kits this fall so you can decorate your home, but embroidery on clothing is another way to level up your stenciled designs and your well-loved clothing items.
You can embroider as much or as little of the design as you like. Embroider the entire design for a real statement or embroider a few key elements to make them pop!
Stenciling with Chalk Couture
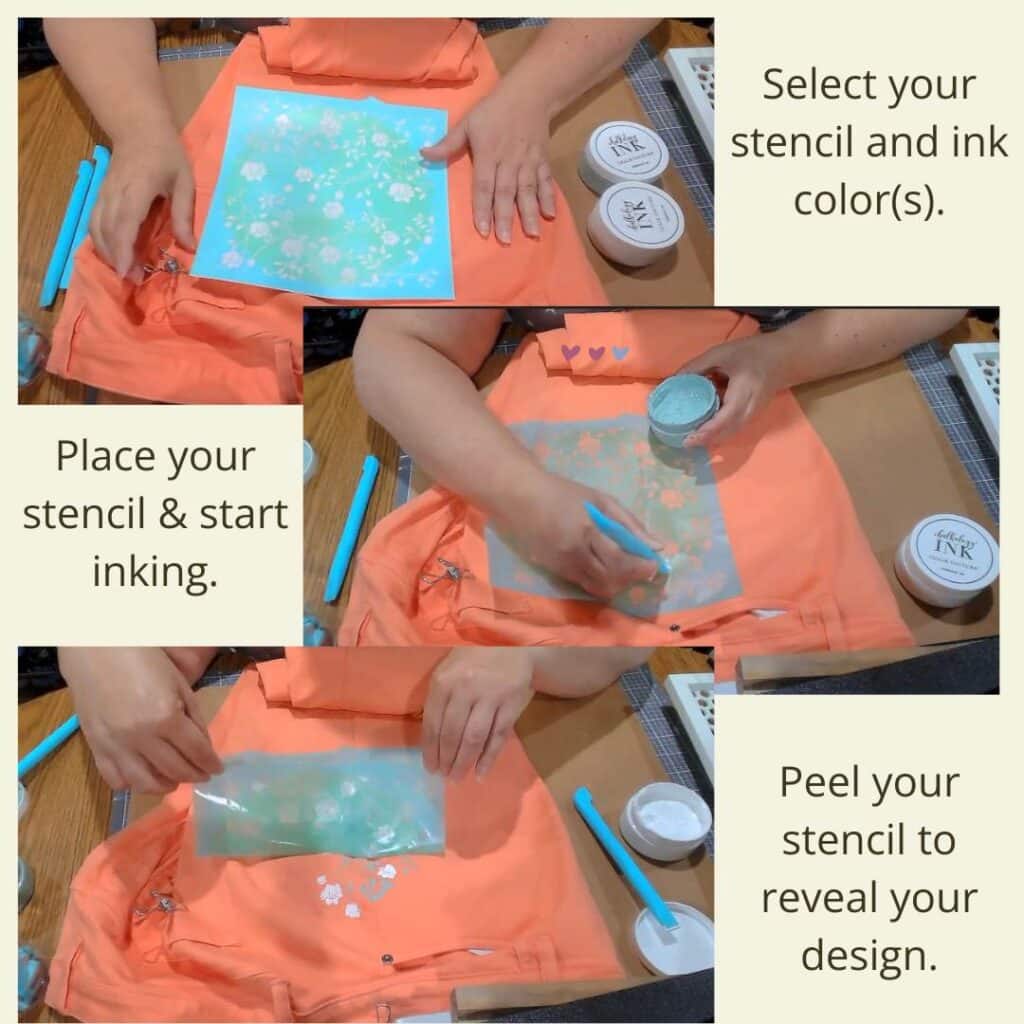
Since we’re going to talk about embroidering a stenciled design, let’s start with stenciling. The required supplies and the process will be the same for each stenciling project, and this project will be the base for the embroidery project.
Supplies required:
- bottoms of your choice; think shorts, pants, jeans, capris, and skirts.
- stencil of your choice (The Chalk Couture Stencil Guide provides in-depth details about these easy to use stencils.),
- ink in your choice of color(s) (The Chalk Couture Paste & Ink Guide is your go-to resource for learning about these creamy dreamy products.),
- a squeegee for applying your ink,
- an ink mat to hold your material flat,
- parchment paper,
- an iron or a heat press to heat set your design.
Stenciling Steps:
- Iron your clothing piece if needed.
- Press your ink mat to the inside of your clothing piece to hold it in place. Make sure to flatten out the fabric so there are no wrinkles or bumps.
- Apply the stencil to your clothing ensuring there are no air bubbles in the silk screen. Bubbles cause bleeds, so spend some extra time on this step!
- Apply ink to your stencil using a light touch and ensure the fabric under the silk screen portion of the stencil is fully covered with ink. Work slowly and move in one direction if at all possible. Ink does not dry as fast as chalk paste, so there’s no need to hurry.
- Slowly peel your stencil from your clothing. If you peel slowly, you can always lay the stencil back down and add more ink if it’s needed in any areas. If you are laying your stencil back down, make sure it is adhered to the fabric well and there are no air bubbles.
- Wash your stencil and squeegee with water and lay your stencil sticky side up on a towel to dry.
- Let the ink dry overnight for best results. You can speed the drying process along with a blow dryer or a drying tool, but letting it air dry overnight is best.
- Heat set your design and enjoy! (See below for heat setting instructions.)
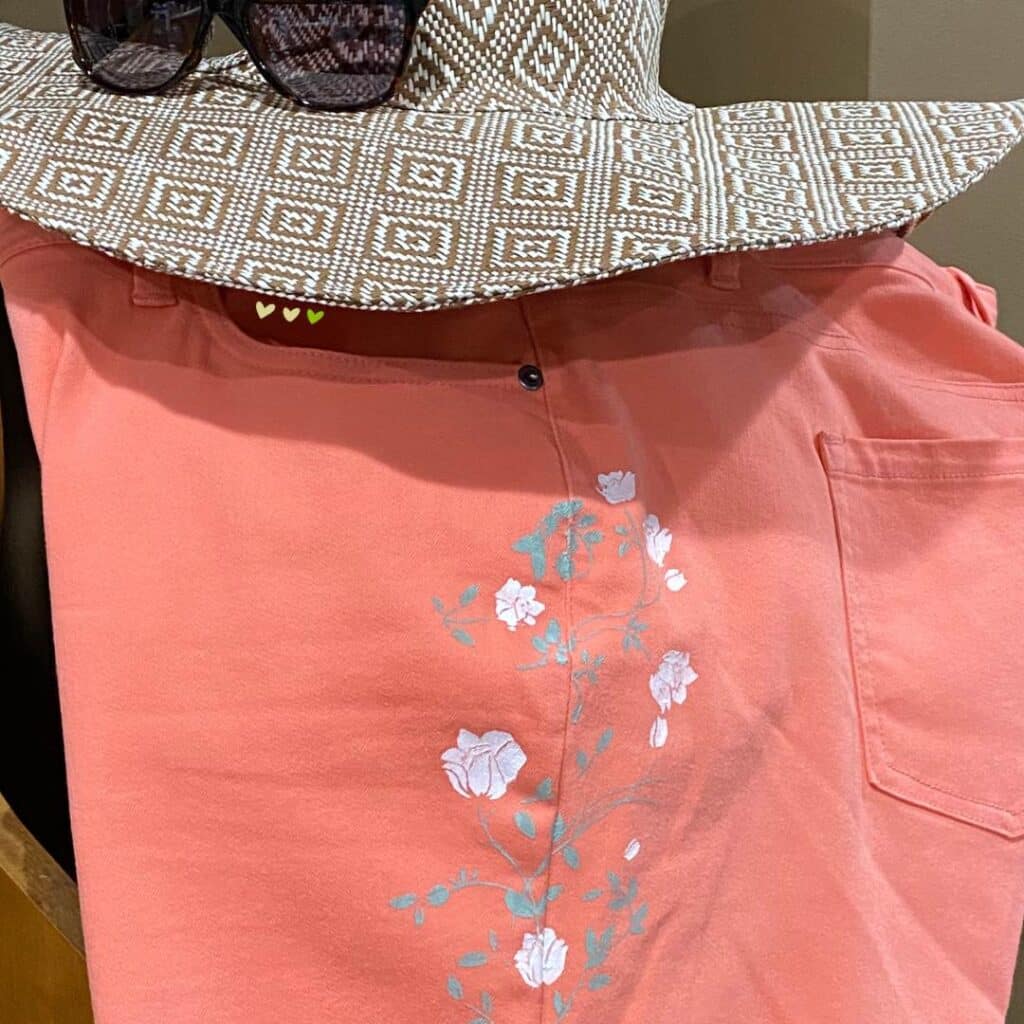
Here’s the finished pair of capris styled with a cute sun hat and a pair of sunglasses. These cute pants make a great base to a summer outfit!
You can heat set your inked design with an iron or a heat press:
- place parchment paper on top of and under your design,
- heat your iron or heat press to the correct temperature for your fabric,
- if using an iron, place iron on top of parchment paper and keep it moving in small circles for 4 minutes. If using a heat press, press down on top of the parchment paper for 30 seconds. You can move the heat press around in small circles if desired.
- turn clothing inside out and repeat above step.
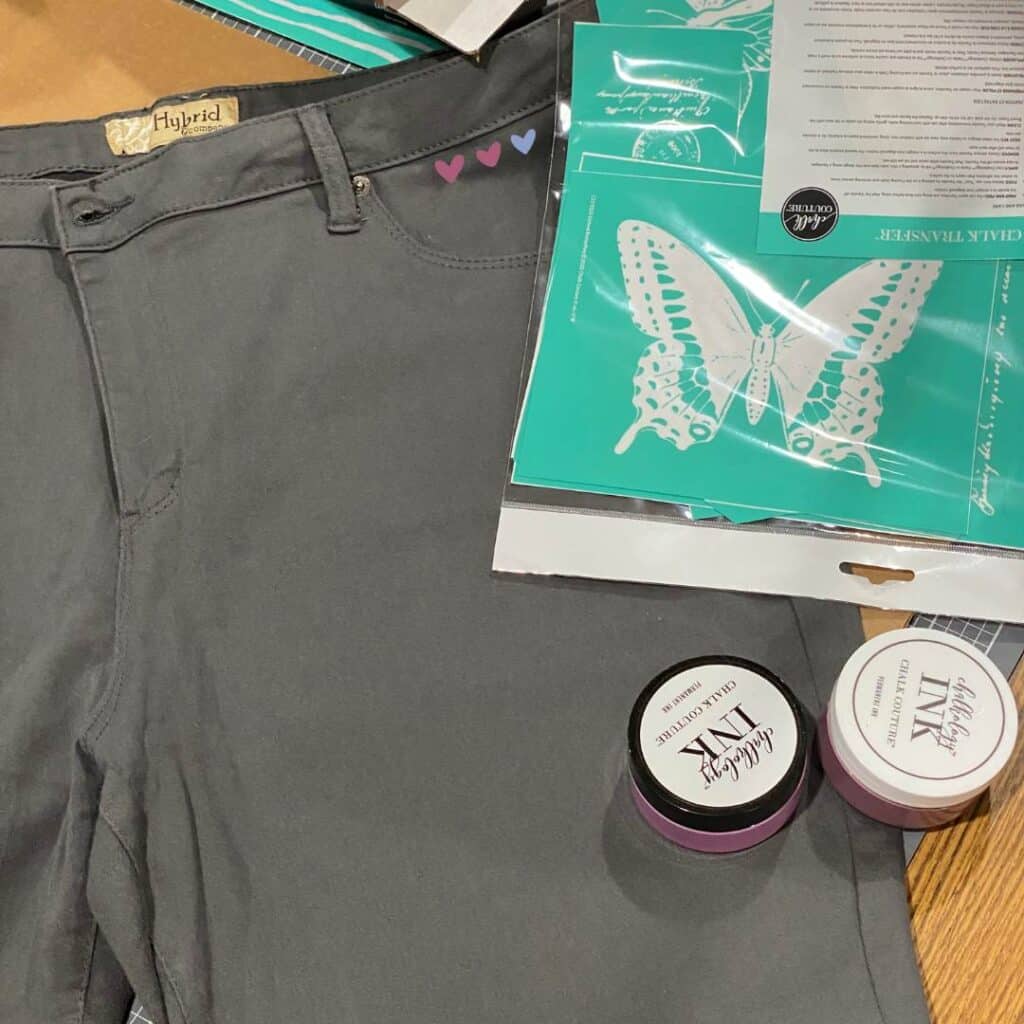
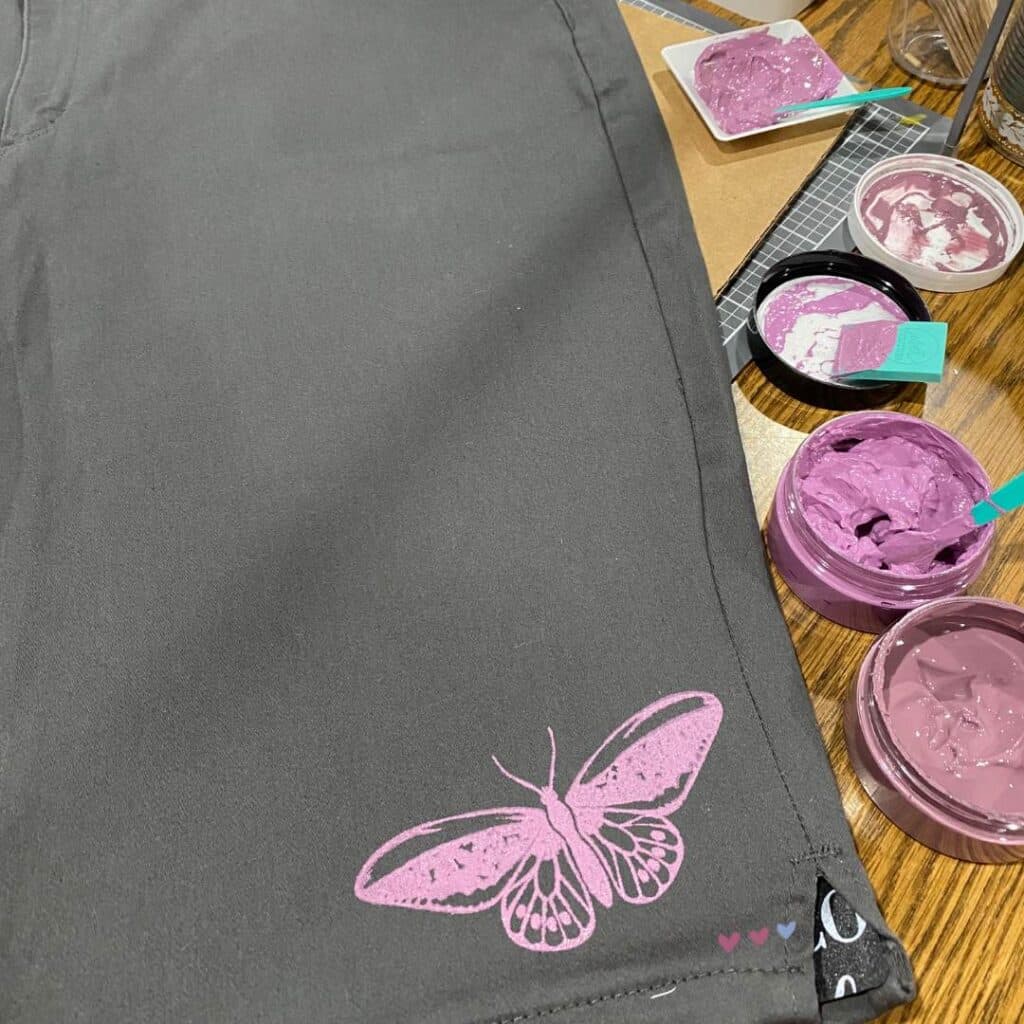
Here is another project decorated with a Chalk Couture stencil and ink. The design is from the Etched Butterflies stencil, and the color is Berry ink with a smidge of Fig ink mixed in to darken it up.
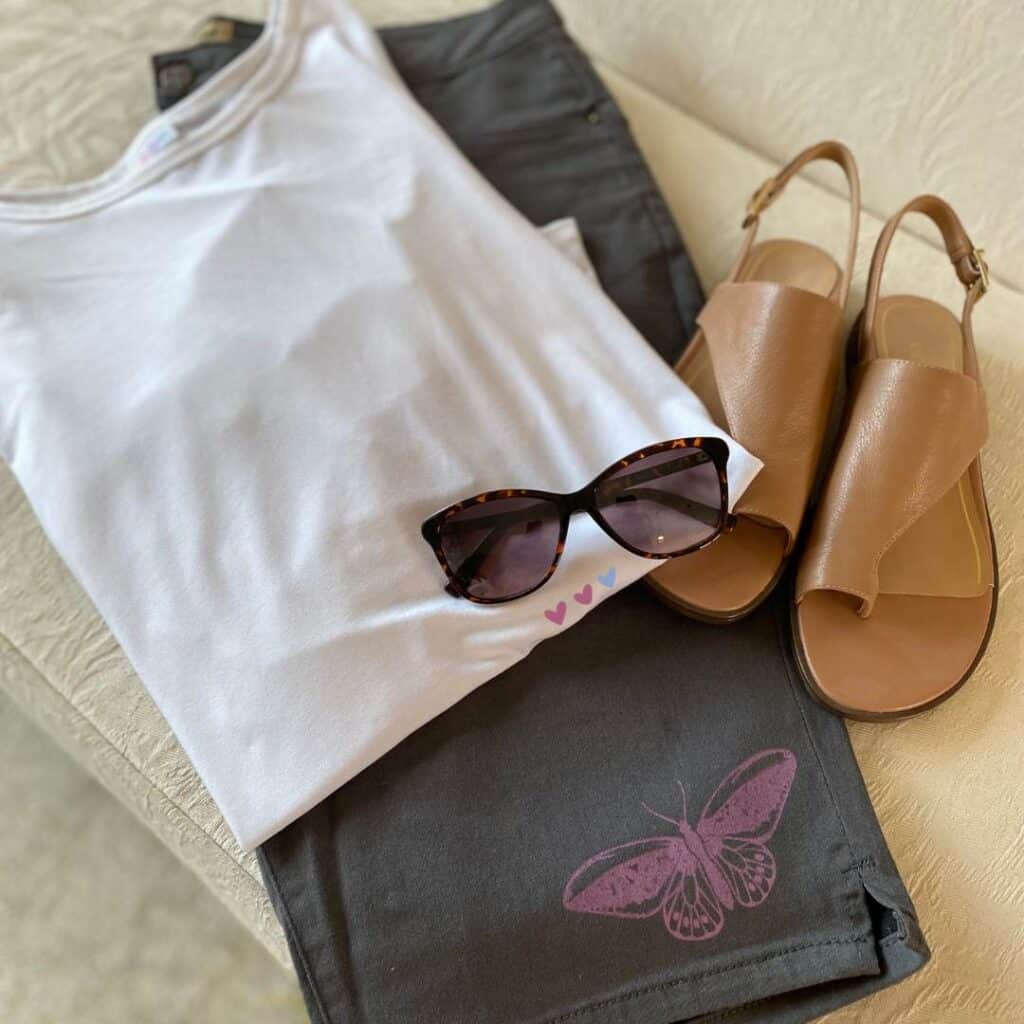
This pair of Bermuda shorts is a great foundation to a cute summer outfit! Here they are paired with a white t-shirt, sunglasses and a cute pair of tan sandals. It’s so fun to sport a cute little butterfly on your shorts!
Now let’s add some stitching…
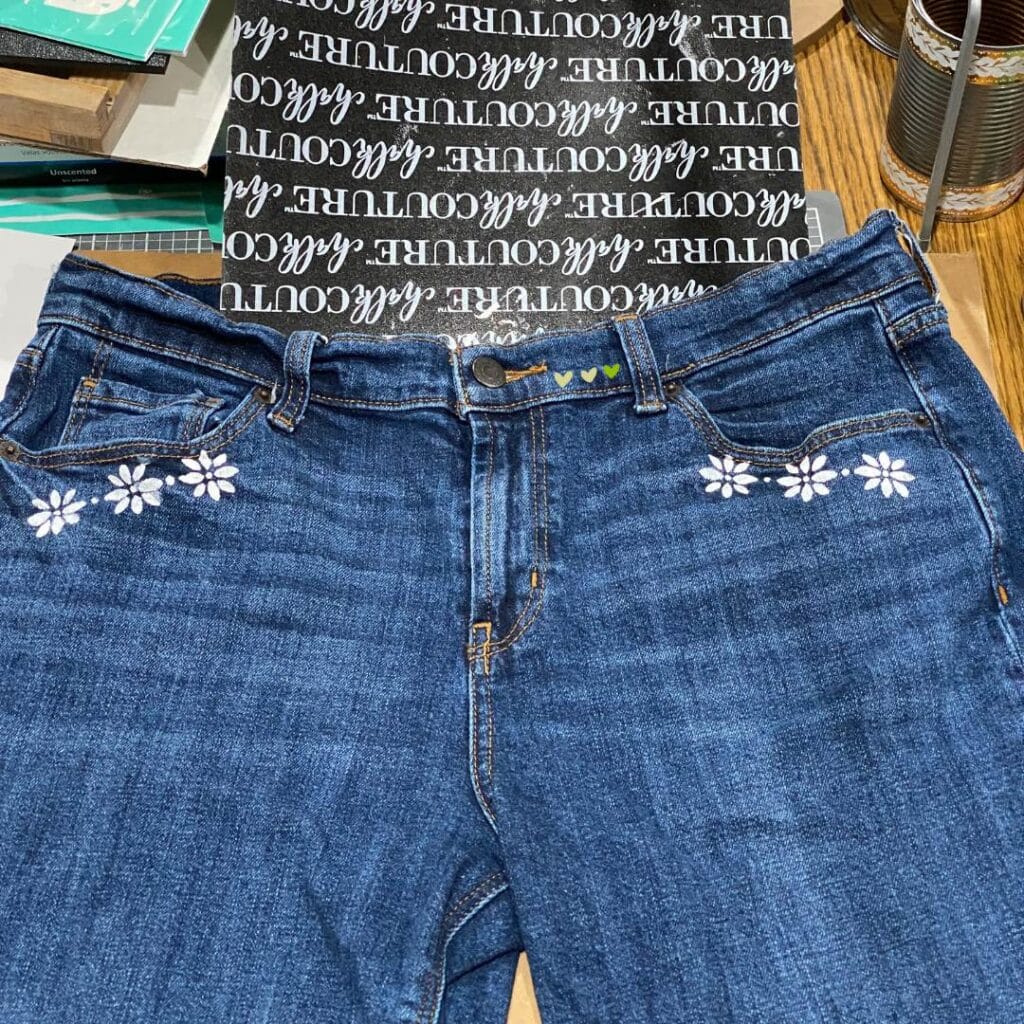
Adding some embroidery stitching to your clothes gives them an extra special touch! You can make your stitching as easy or complex as you like. The stitching on these jeans includes only two types of stitches: a simple satin stitch on the petals and a French knot in the dots. If you need stitching guidance, the RSN Stitchbank is a great resource!
Supplies required:
- a piece of clothing with a stenciled design,
- embroidery floss in colors of your choice,
- a needle,
- embroidery hoop (optional for denim).

Project steps (after your ink is heat set):
- decide on the stitches you’d like to use,
- thread your needle,
- make your selected embroidery stitches on the selected elements of your design; remember, you can embroider as much or as little of your design as you’d like!
- Enjoy your upcycled bottoms!

Upcycled bottoms bring a little flair to your outfit and are so easy to diy! They look great stenciled with designs that showcase your personality, and if you’re up for a little more craftiness, you can add some embroidery stitches to give those upcycled bottoms some extra oomph!
I hope these projects gave you some ideas on how you can upcycle some of your well-loved pants or skirts!
I can’t wait to see what you create!
Sustainably yours,
Luana