Celebrating Earth Day with some thrift flips is a great way to live sustainably and have some crafting fun! Having an Earth Day Challenge between friends to go green with 5 projects in 5 days was a blast! Check out our 5 projects with before and after pictures!
Thrift Flips to save the planet
Focusing on sustainable and eco-friendly crafting helps keep items out of landfills and helps you use your creativity and imagination. There are so many different ways to flip thrift store treasures! You can breathe new life into items with some cleaning and painting. You can repurpose items into something totally different or you can upcycle those treasurers into a better piece of home decor than what you originally found!
Let’s take a look at 5 projects from an Earth Day challenge to go green by transforming thrift store finds!
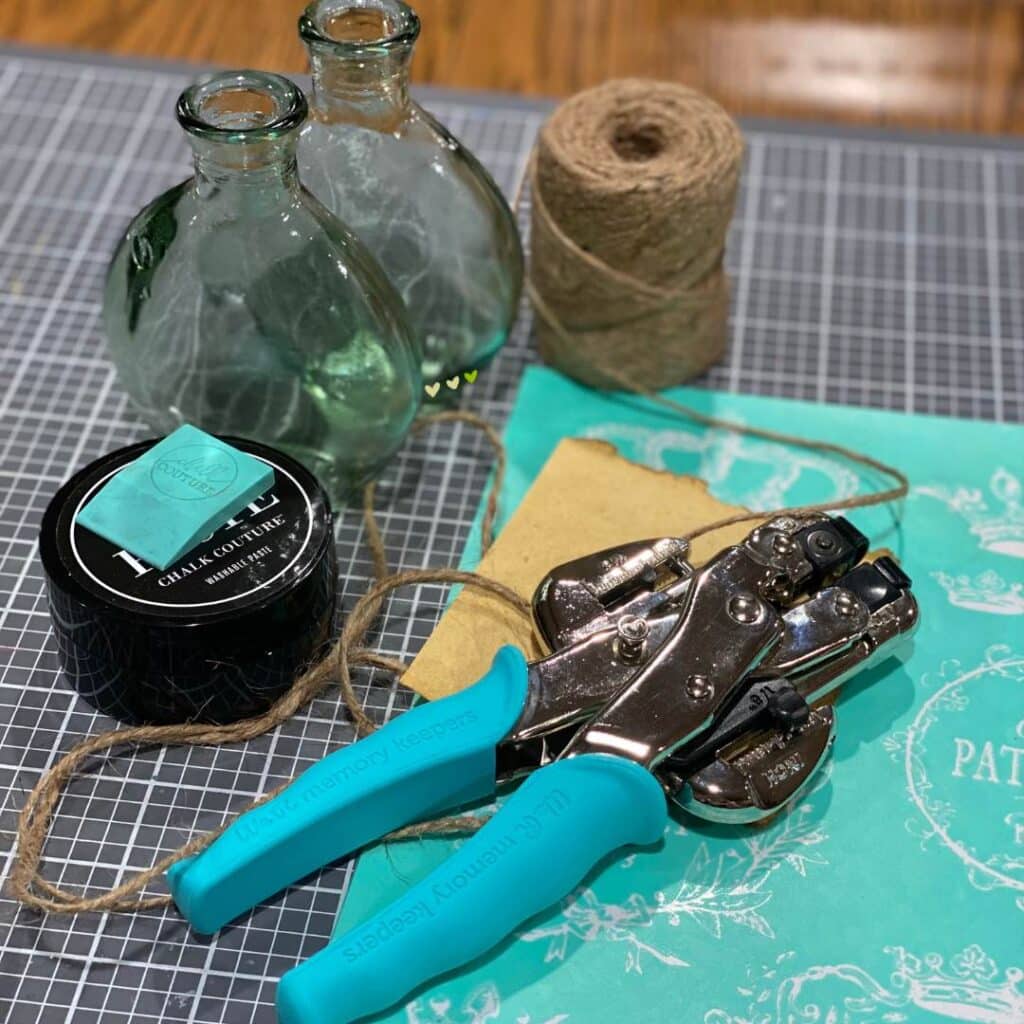
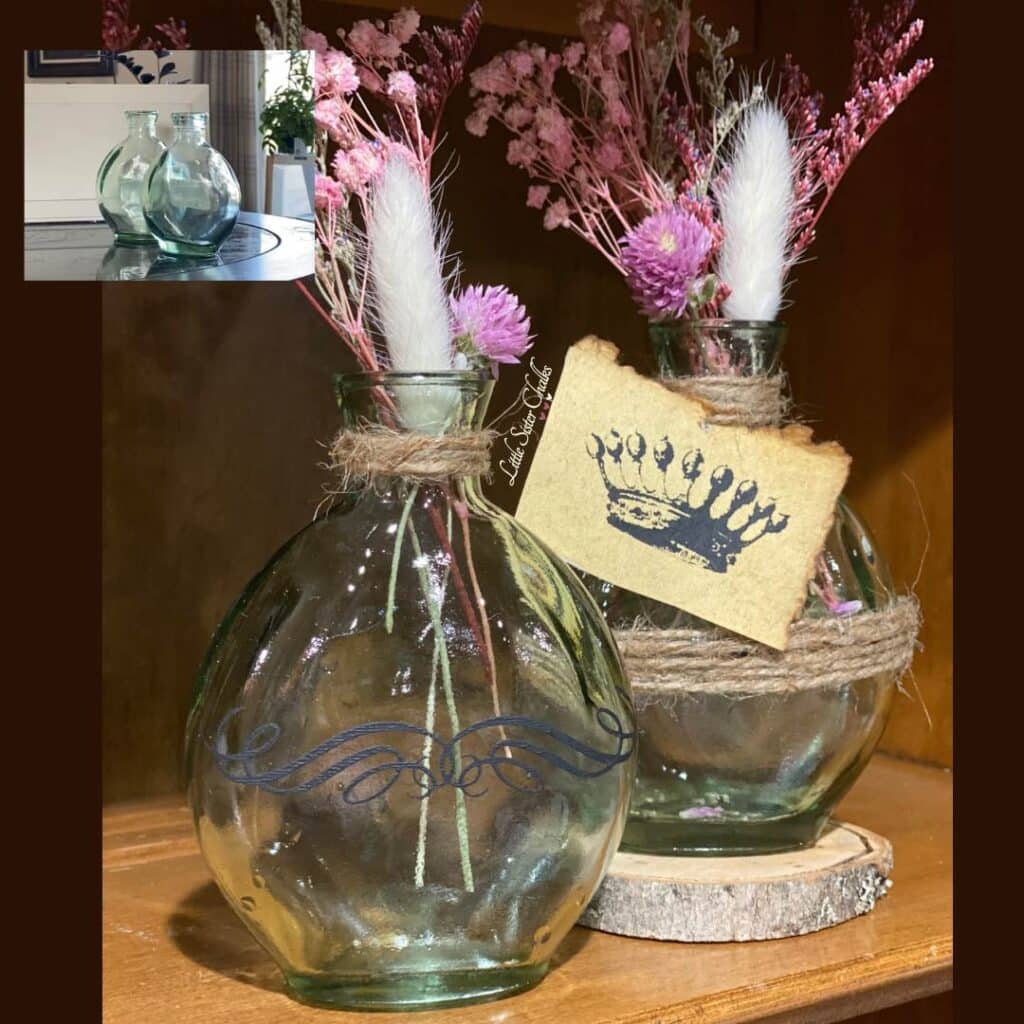
Glass Bottle Project
These were such easy thrift flips! After cleaning the bottles with some dish soap, one bottle was stenciled with a design right on the front with Chalk Couture Black Velvet chalk paste.
The second bottle has some twine glued to the center of the bottle and a crown stenciled on a small piece of scrap paper and tied to the neck of the bottle with more twine.
Pro Tip: when you are using Chalk Couture stencils on glass, fuzz the stencil really well so that you can easily remove it from the glass without stretching the silk screen design.
Supplies needed:
- glass bottles of your choice,
- stencils of your choice. For these bottles, one element of the Appreciate It stencil (retired) and one crown from the Chalk Couture Vintage Label and Crowns stencil were used.
- twine,
- chalk paste in a color of your choice. For these projects, Chalk Couture Black Velvet Chalkology Paste was used.
- a squeegee,
- glue (hot glue was used for this project, but you could use whatever glue you have on hand),
- optional: dried flowers of your choice.
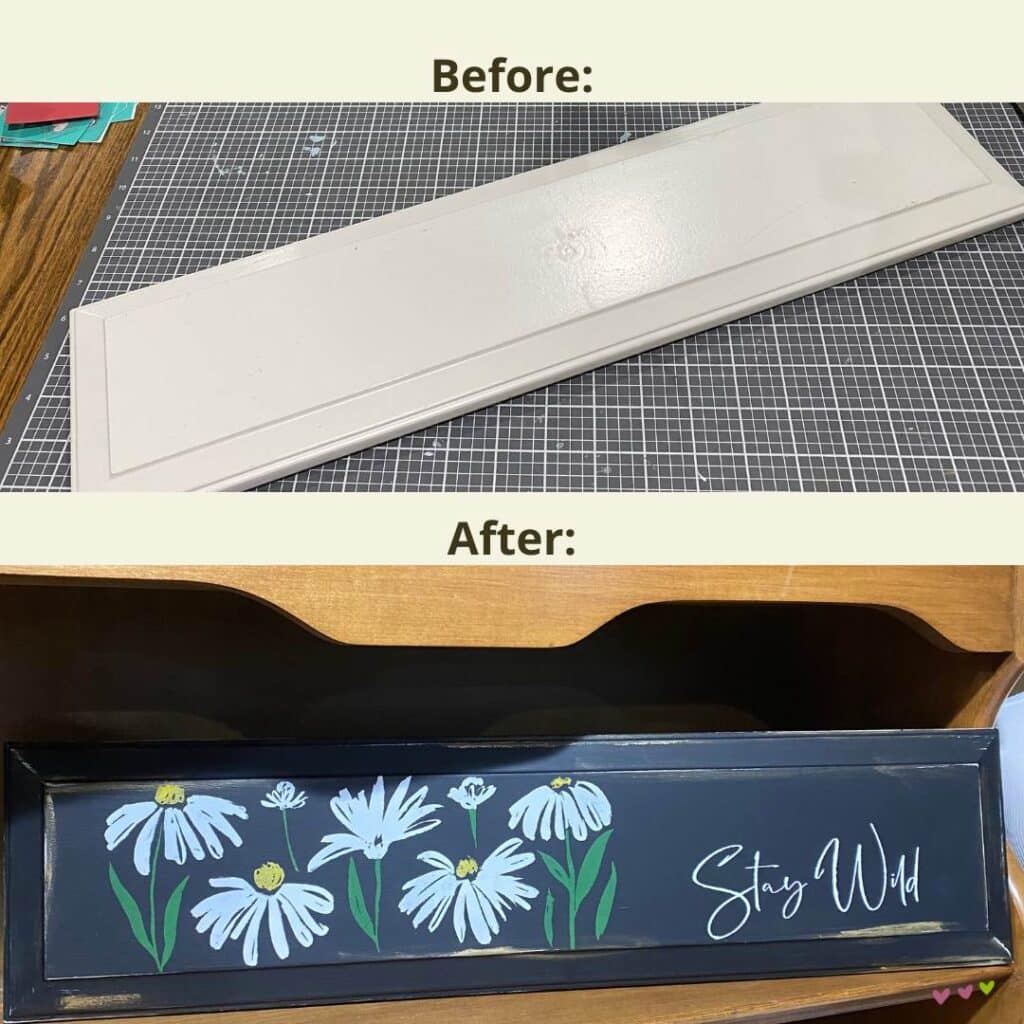
Drawer Front Project
Drawer and cabinet fronts are so much fun to transform! You can use so many different designs and even repurpose them into key or leash holders by adding hooks. This white drawer front was a blank slate and a perfect surface for these daisies.
Supplies needed:
- a drawer or cabinet front,
- paint of your choice,
- sand paper,
- a stencil of your choice. For this project, a section of the Chalk Couture Mama Needs Coffee and Stay Wild stencils were used.
- chalk paste of your choice. For this project, Chalk Couture Chalkology Paste in Bright White, Pucker (April color of the month) and Meadow were used. Learn about the color of the month!
- a squeegee,
- optional: Dixie Bell Gold Gilding Wax (available through Chalk Couture).
Project Steps:
- Clean your surface really well to remove any grime and grease. This is particularly important if items were previously used in a kitchen. Dawn dish soap works really well on most surfaces.
- For this project, the white paint that was originally on the drawer front was lightly sanded purposefully leaving most of the paint in tact.
- Paint the project with your chosen paint color. This drawer front was painted in Dixie Bell Anchor left over from a previous project.
- After the paint was dry, the drawer was lightly sanded around the corners and edges so that some of the white paint could show through.
- Gold gilding wax was applied sparingly around the sanded edges to give a little shine and pops of color.
- Then the stencils were applied and chalked. The chalk and lift technique was used on the daisies due to the use of multiple colors.
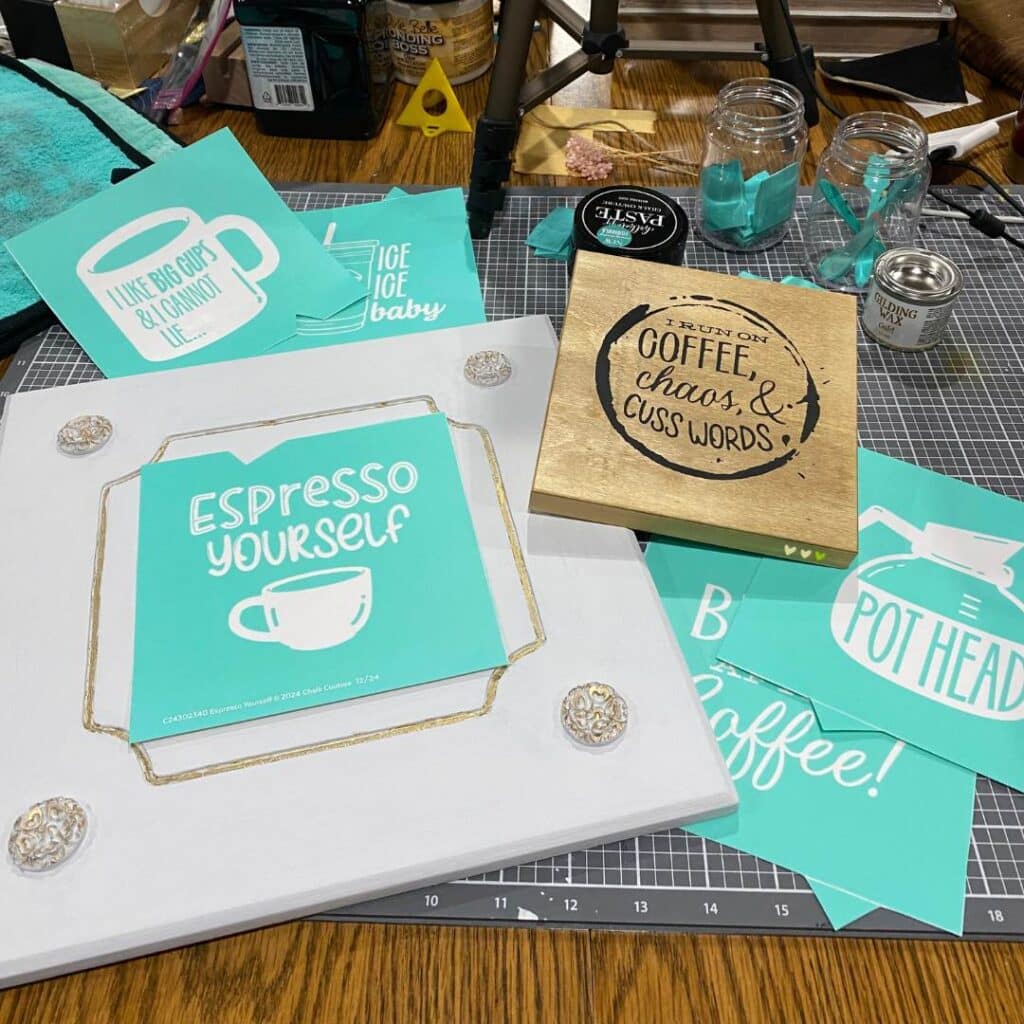
Wall Art Refresh Project
You’ve probably seen dated wall art pieces in someone’s home at some point in your life! Still life fruit used to be a big deal! These art pieces were easy and fun thrift flips, and they lent themselves to all sorts of designs! A good coffee theme seemed to be just the right touch for them!
Supplies needed:
- thrifted wall art of your choice,
- paint of your choice,
- sand paper to scuff up the surface and remove the prior images or Dixie Bell Bonding Boss in grey (as was used for this project).
- paint brushes both large and small,
- stencils of your choice. For this project, the Chalk Couture Espresso Yourself stencil was used which includes a set of 6 coffee inspired sayings that are fun and sassy!
- chalk paste of your choice. For this project, Chalk Couture Black Velvet Chalkology Paste was used.
- a squeegee,
- optional: Dixie Bell Gold Gilding Wax.
Project steps:
- Clean your surface really well to remove any grime and grease. This is particularly important if items were previously used in a kitchen. Dawn dish soap works really well on most surfaces.
- Sand or prep your surface for paint. For this project, Dixie Bell Bonding Boss was painted on the surface before painting.
- Paint the project with your chosen paint color.
- Gold gilding wax was applied sparingly in the crevices in the center of each surface and to highlight the little medallions in each corner.
- Then the stencils were applied and chalked.

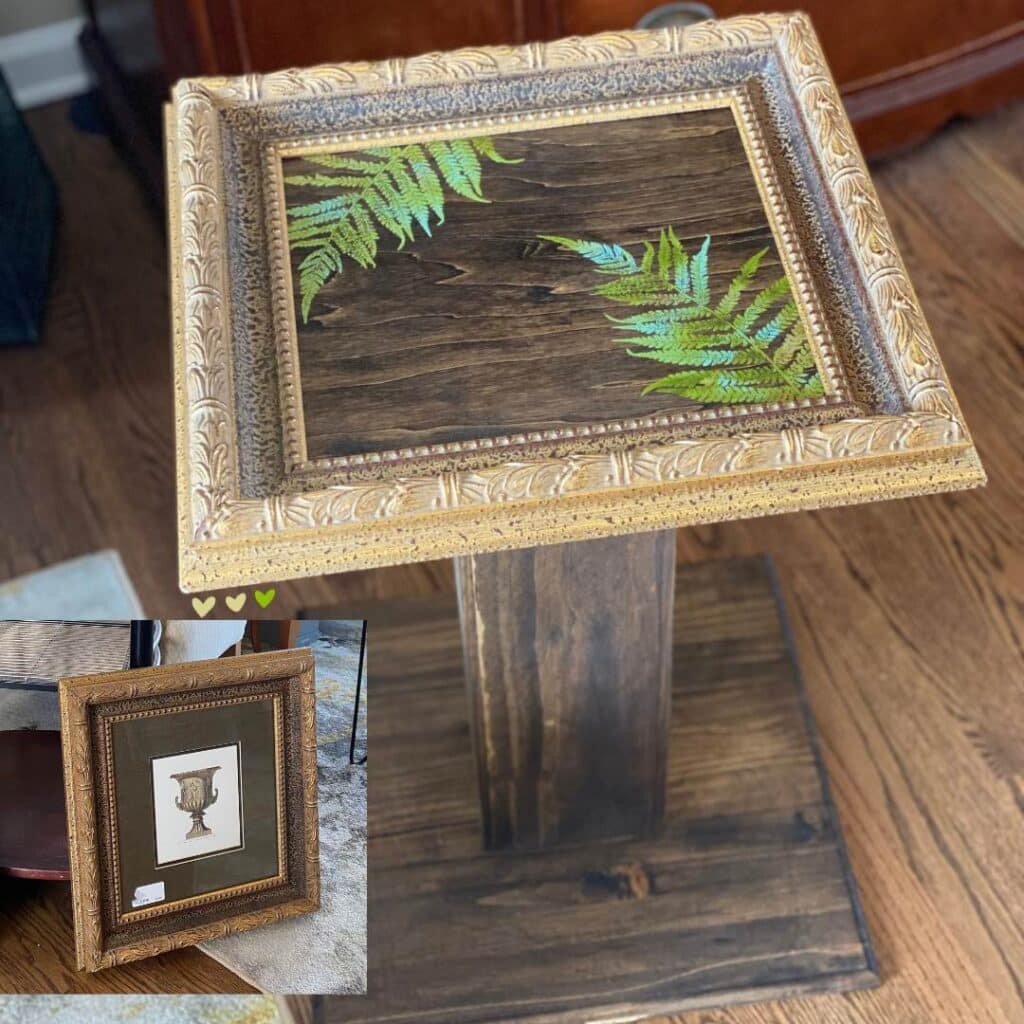
Picture Frame Repurpose
Picture frames make great thrift flips! You can update what is in them or repurpose them into something else entirely! A found picture frame makes a beautiful table that can be enjoyed any time you sit by it with a nice cup of coffee or a cocktail!
Supplies needed:
- picture frame of your choice,
- wood or other material you want to set inside the frame,
- wood for the base,
- stain of your choice,
- stencil of your choice,
- chalk paste of your choice,
- wood glue,
- nails and a hammer,
- sealer of your choice. There are a wide variety of spray sealers available at craft and hardware stores.
Project Steps:
- clean and disassemble your frame,
- cut a piece of wood or other material to use as a table top that will sit inside the frame,
- stain the wood inset and base,
- once the stain is dry, apply your stencil and chalk it with your choice of paste colors. For this project, the marbling technique using chalk paste in Meadow, Eucalyptus, Nominee and Bubbly (a former color of the month) was used on a retired fern stencil. Learn more about the marbling technique!
- once your chalked design is dry, apply several coats of sealer to protect it since this piece is being used as a table,
- assemble the pieces of the table – insert the chalked piece into the frame and secure it with glue or picture points (small backers to hold photos in place), secure the base to the frame with nails and glue.

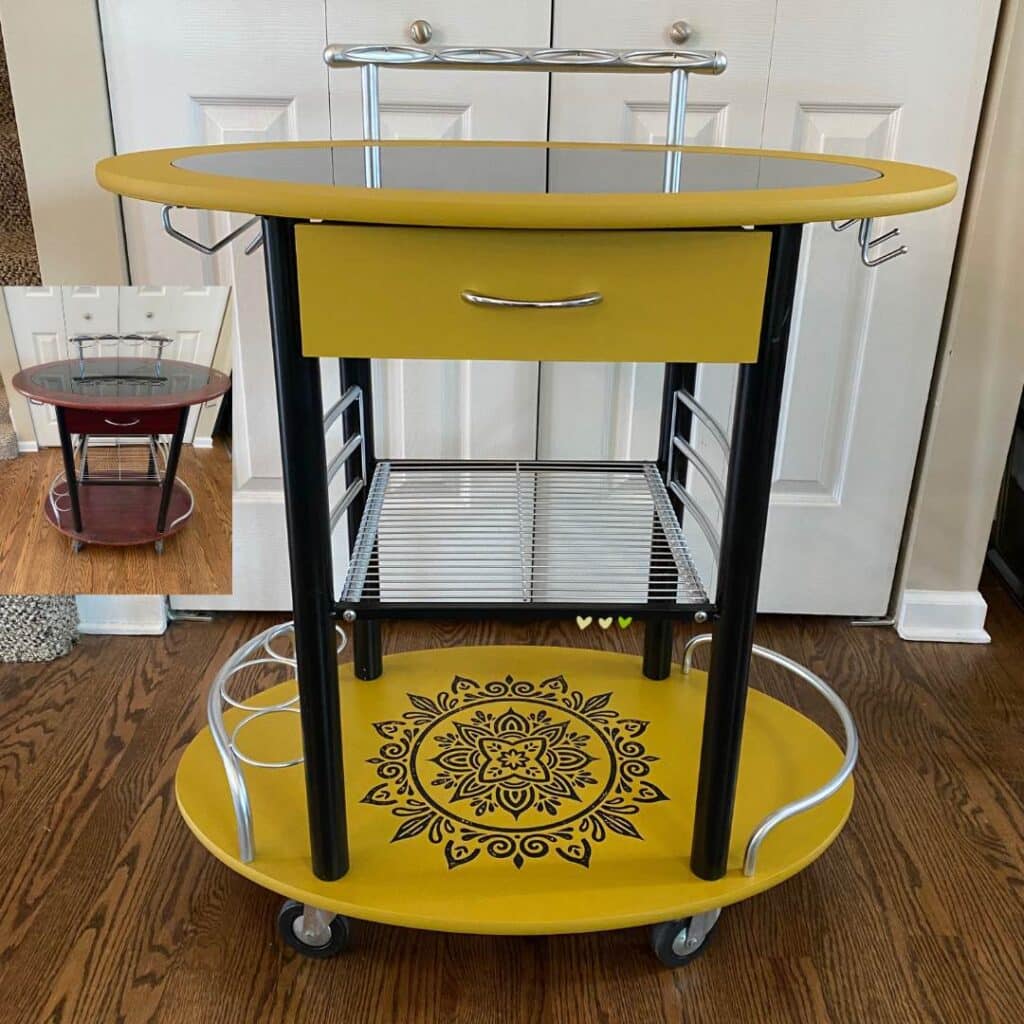
Bar Cart Upcycle Project
The show Flea Market Flip always has a team that makes a bar cart! Sometimes you’ll find one with good bones that just needs a little TLC! This was as quick and easy as thrift flips come!!
Supplies needed:
- a bar cart that needs some TLC or a piece of furniture you can envision as a bar cart!
- paint of your choice. For this project, Dixie Bell Yellowstone Silk paint was used since it was on hand from a previous project.
- sand paper or Dixie Bell Bonding Boss in grey to prep your surface,
- paint brushes and rollers,
- a stencil of your choice,
- chalk paste of your choice,
- a squeegee,
- sealer of your choice.
Project Steps:
- clean your bar cart,
- sand your wood pieces or use a bonding product so your paint has something to adhere to,
- paint your wood pieces,
- once your paint is dry, apply stencil where desired and chalk on the design. A retired floral medallion stencil was used for this project.
- once your chalk paste is dry, seal your stencil design with several coats of sealer to protect your design.

These thrift flips were designed to give you some ideas and inspiration! Go hunt for some treasurers that you can breathe new life into! Whether you hunt in your own home, at a thrift store, or at a garage or estate sale, be on the lookout for versatile pieces with good bones made from sturdy materials! Let your imagination run free and create something to showcase in your home or give as a gift!
Transforming treasurers is good for our planet and for us! We can use our talents and skills to keep things out of landfills and spend some time doing things we enjoy!
Sustainably yours,
Luana