
It’s time to give a tiered shelf new life and be inspired to use items around your home in different ways. Before you trash or give something away, consider whether you can tap into your creativity and reimagine it into something new!
See how to give a tiered shelf new life!
This hanging shelf unit sat in my shop without getting much love! It was a great way to display other items, but it just wasn’t selling. After it sat in the basement for quite a while, it was time to see how else it could be used.
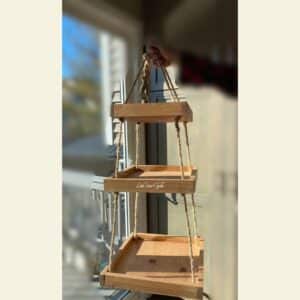
When you’re looking to reimagine something, don’t be afraid to deconstruct it and use the pieces in entirely different ways! Or try turning it upside down or backwards to see if your imagination discovers a new purpose for it! Taking the shelving unit apart and using each tier separately was how this shelf got a new life!
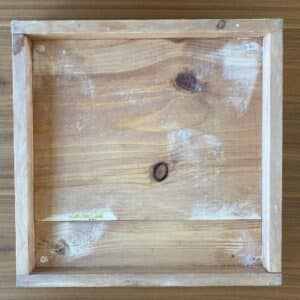
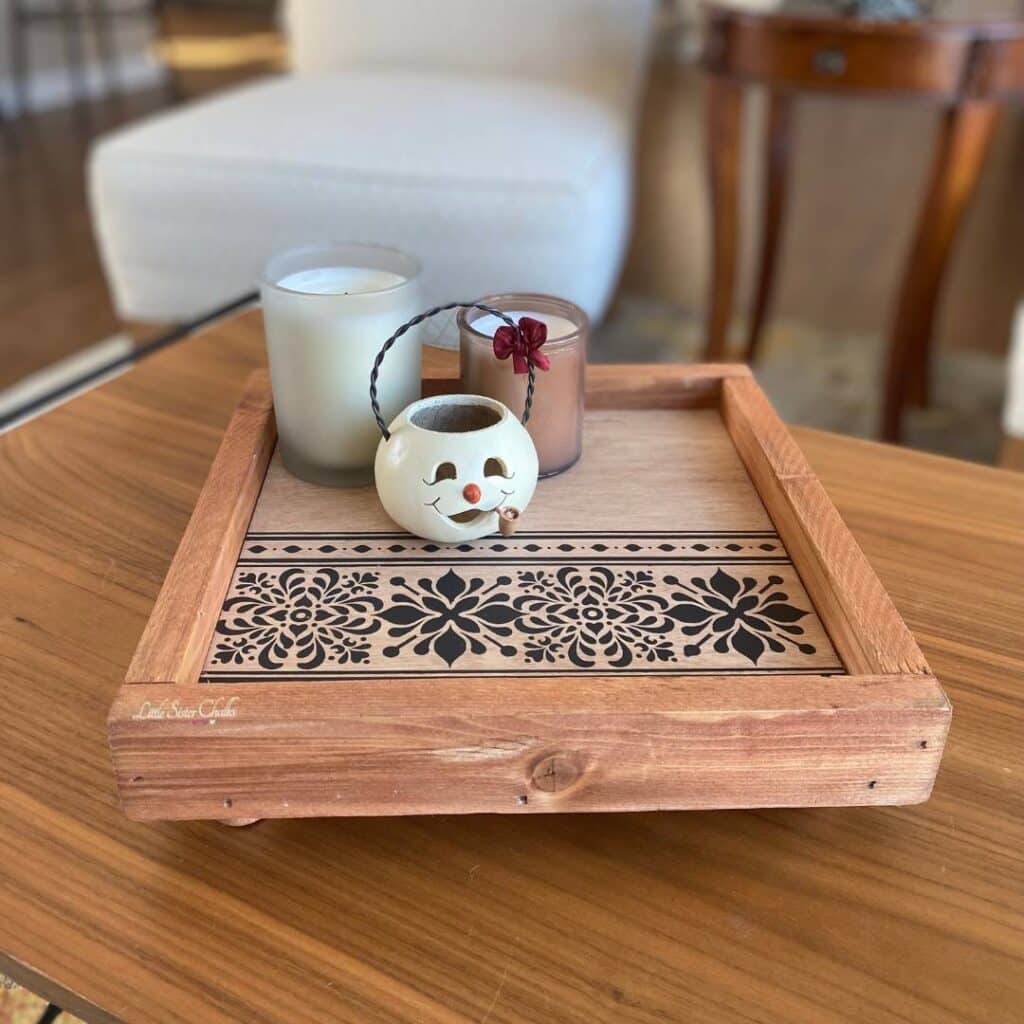
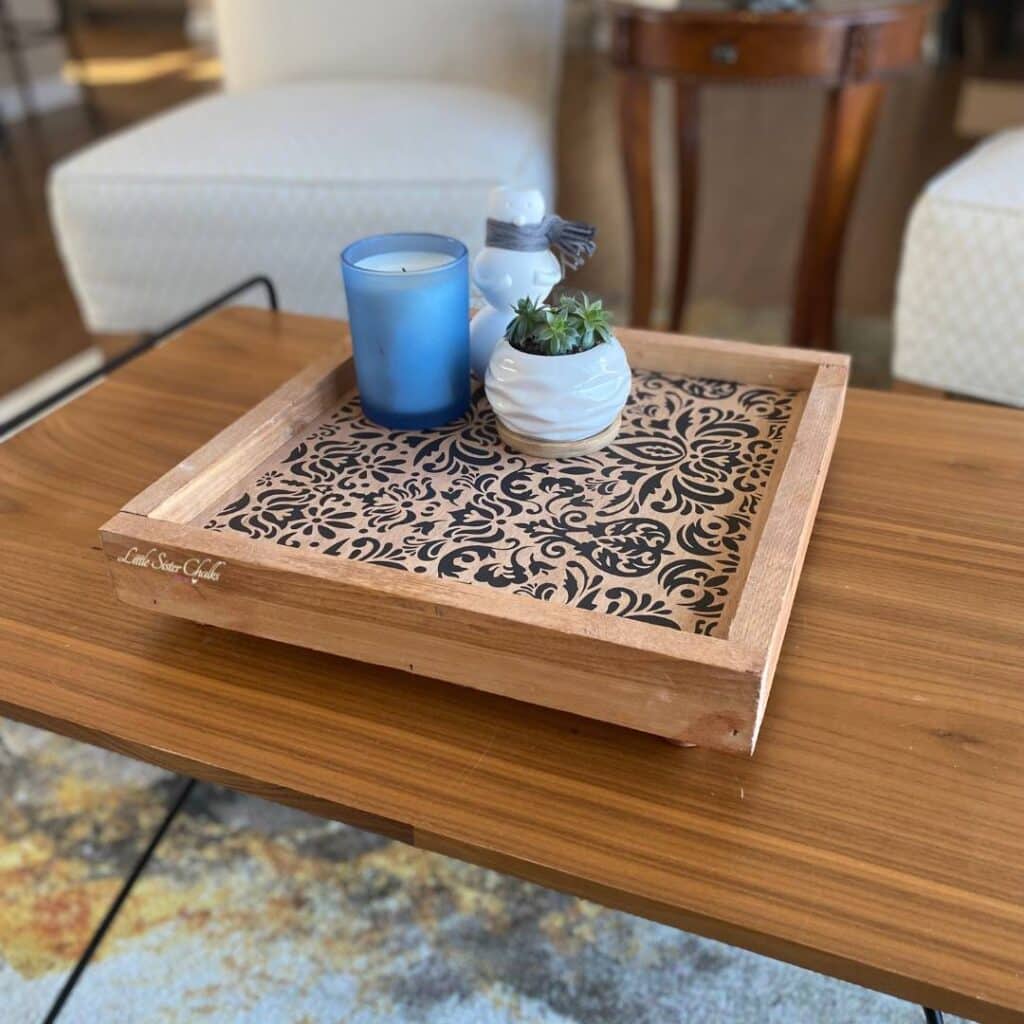
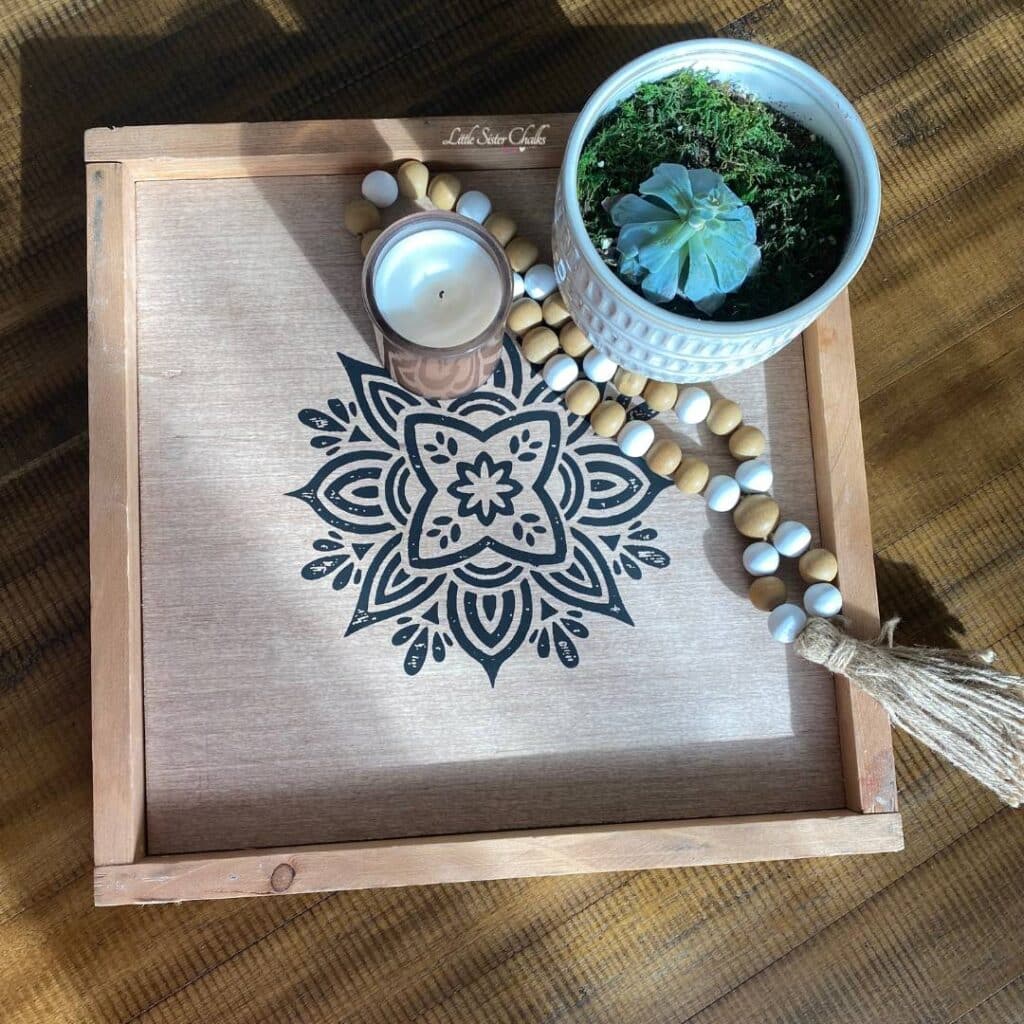
This was a relatively simple transformation as it basically involved some deconstruction and patching up some holes where the rope ran through the tiers. Feet were added to the top two tiers to turn them into risers, and the largest tier became a tray.
When you’re looking to reimagine something, don’t be afraid to deconstruct it and use the pieces in entirely different ways!
~ Luana, Little Sister Chalks
List of supplies
Here is a list of supplies used to repurpose this shelf into something new:
- sand paper,
- wood putty,
- stain,
- finishing wax (Chalk Couture wax was used for this project but you can use any finishing wax you have on hand),
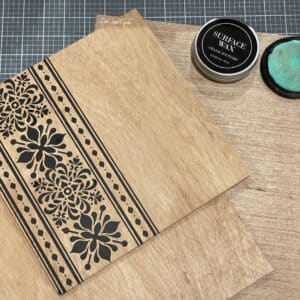
- your choice of stencil design (the following Chalk Couture stencils were used for these projects. To learn more about about these stencils see the Chalk Couture Stencil Guide.)
- the Home Sweet Home stencil was used on the smallest tier,
- the Damask pattern (retired) was used on the middle tier,
- a portion of the Large Floral Medallion was used on the largest tier.
- your choice of chalk paste or a paint that works with your stencil (Chalk Couture Chalkology Paste in Black Velvet was used here. To learn more about Chalk Couture paste see the Chalk Couture Paste & Ink Guide.)
- sealer of your choice,
- Optional:
- plywood to cover bottom of shelves (since holes and the screws to attach the feet for the risers would show, plywood was cut to fit the bottom of each tier),
- handles for tiers used as a trays,
- dowels cut down to size to make feet for the risers and screws to attach the dowels.
Steps to create the risers and tray:
- Deconstruct the shelves by removing the rope,
- Fill holes with wood putty, let dry and sand,
- These steps are optional if making risers or putting handles on trays:
- attach feet with screws for risers,
- attach handles with screws for trays.
- Cut plywood to size,
- Stain plywood pieces,
- Wax plywood pieces to protect the stencils,
- Apply stencil design with chalk paste or paint,
- Seal the stencil design,
- Insert the plywood pieces into each tier,
- enjoy!

Getting inspired to give a tiered shelf new life by using each tier separately turned out to be a great idea! Repurposing or reusing things we have around the house is a great way to save our planet and live a greener life. It was fun to make three new projects from something that was collecting dust in the basement!
I hope these ideas give you some inspiration to reimagine something you find in your home! Take a look around and see what might need a little love! Maybe you can give a tiered shelf new life! I can’t wait to see what you create!
Sustainably yours,
Luana