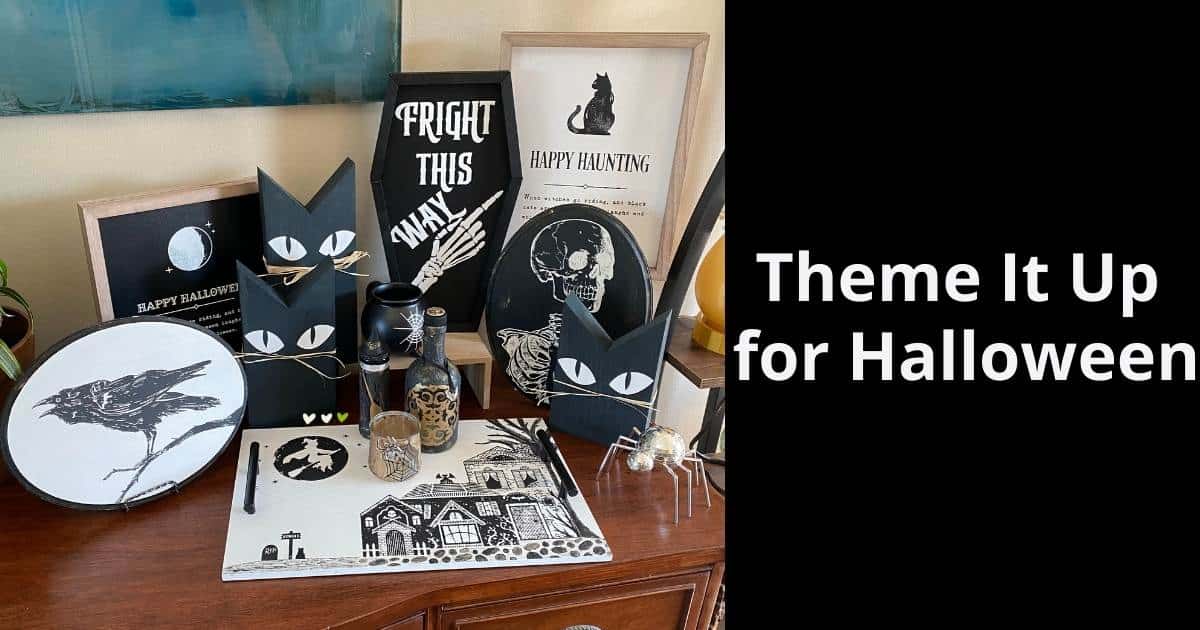
Let’s theme it up for Halloween! Without any planning, the latest Halloween projects have taken on a theme of their own! In this blog, you’ll find information about a variety of projects done in black and white, but before we get to the project details, let’s talk a little bit about decorating with a theme in mind.
Theme it up for Halloween
There are so many different ways you can decorate for Halloween! From spooky to funny, using all sorts of colors and icons perfect for the season!
Here are a few themes to consider if you’re ready to theme it up for Halloween!
- Color: the theme for this blog post is black and white, but there are so many Halloween colors you can consider. Orange and black is pretty standard, throw in some green and purple for a shot of color, or maybe even consider a pink Halloween! “Pinkoween”, like Pinkmas, is really on trend!
- Classic holiday themes: there are so many classic icons you can choose from when decorating for Halloween. Some of the good old standard icons include witches, pumpkins, ghosts, and skeletons. But don’t forget zombies, spooky houses, cats and spiders! You really can’t go wrong with any of them!
- Movies or tv shows: you can get great inspiration from your favorite Halloween movie like Hocus Pocus or the Nightmare Before Christmas. Don’t forget “It’s the Great Pumpkin, Charlie Brown” which would make really fun theme it up for Halloween decor!
- Express personal interests like your love of cats or fascination with owls. Mushrooms are also very trendy and have gained momentum as a Halloween decor item this year! The best part of this theme is that you’re likely to keep it up through Thanksgiving!
Black and White Themed Halloween Decor
Without meaning to, this year’s Halloween crafts have mostly been done in black and white which led to the “theme it up for Halloween” focus. You really can’t go wrong with classic black and white!
Below are details about 5 black and white Halloween projects:
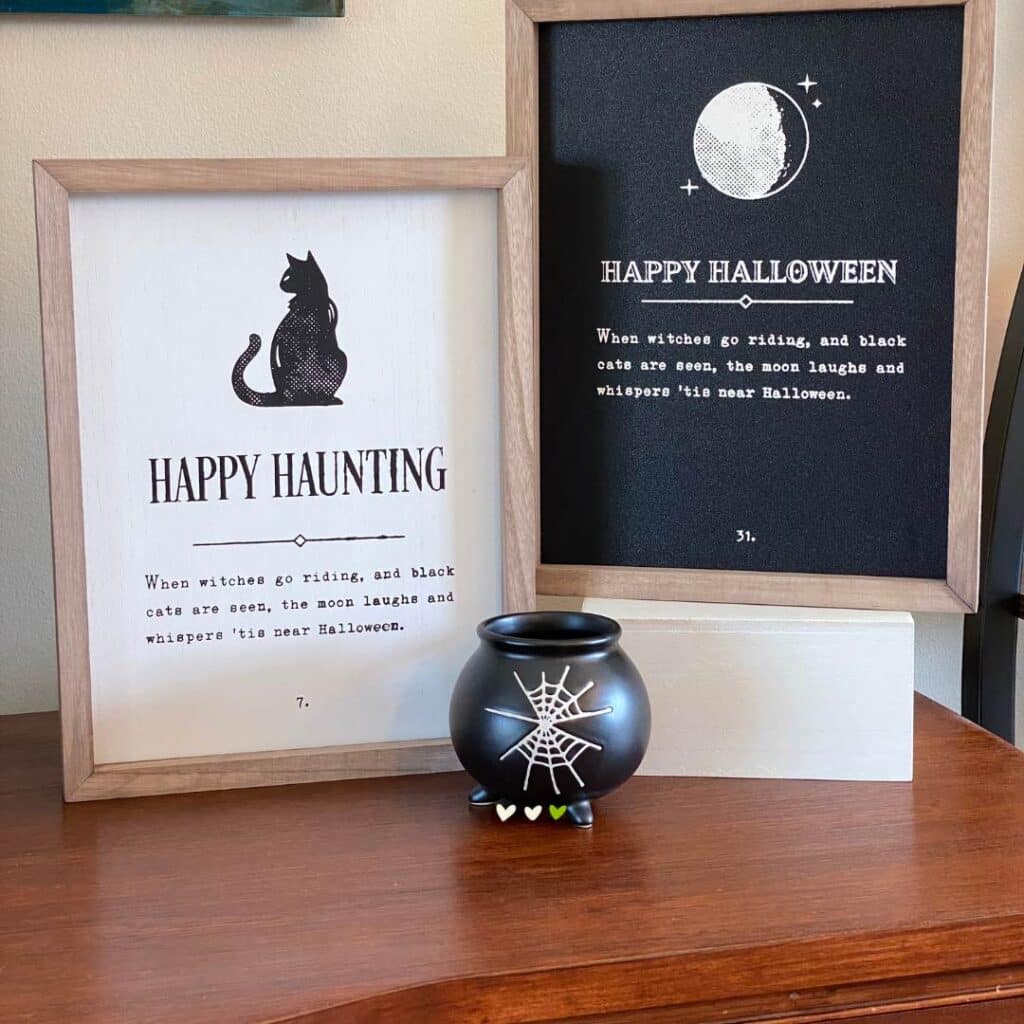
Happy Haunting Box Frames
The Happy Haunting Box Frames are made using Chalk Couture products. They are simple and make a great impact when displayed with other black and white decor items.
Supplies required:
- A Chalk Couture Outside the Box Frame, which is a box frame with an insert that can be used on both sides or switched out for other insert options. The box frame comes with a wood grain insert that is white on one side and stained wood on the other. Or switch it out for a Couture Boutique insert that is white on one side, black on the other and reusable! The Chalk Couture Surface Guide will give you more information about Chalk Couture surfaces.
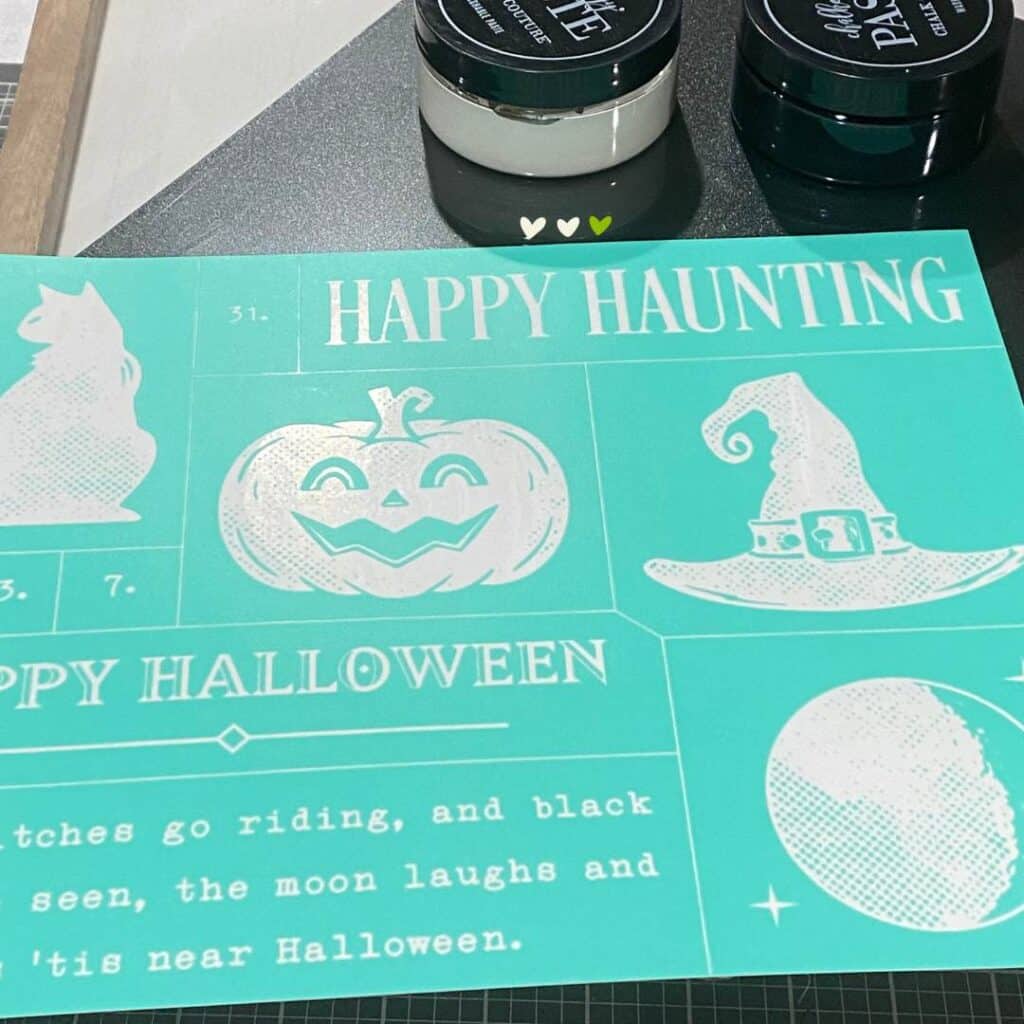
- The Chalk Couture Happy Haunting stencil. This stencil has so many elements that can be used together or in any creative way you’d like! The little icons would look great on a t-shirt, a onesie or a tote bag! Learn more about Chalk Couture stencils with the Chalk Couture Stencil Guide.
- Chalk Couture Chalkology Paste in colors of your choice. Black Velvet and Bright White were used here to keep with the black and white theme. The Chalk Couture Paste & Ink Guide will give you all the scoop about these awesome products!
- A squeegee or two to apply your chalk paste.
- A fuzzing cloth, or any cloth of your choice, to “fuzz” your stencil.
- Scissors to cut your stencil apart.
Project steps:
- Choose which elements of the Happy Haunting stencil you’d like to use. In the examples below, one box frame has the moon, Happy Halloween and the witches go riding phrase, while the other has the cat, Happy Haunting and the witches go riding phrase.
- Fuzz your stencil pieces. This steps takes a bit of the adhesive away from the back of your stencil to protect it from sticking too hard to your surface and stretching when you remove it. To fuzz, place your stencil adhesive side down on a fuzzing cloth and remove it. Repeat the fuzzing process a few times.
- Position your stencils on your box frame and smooth them out. You want to ensure there are no bubbles in the silk screen portion of the stencil as that may cause the paste to bleed.
- Apply a small amount of paste to your squeegee and spread it over the silk screen of the stencil. Working in one direction creates the best results, so spread your paste up and down or side to side. Scrape off any excess paste and return it to your jar.
- Working fairly quickly, peel up your stencil after you have scraped off any excess paste. Peel from top to bottom or side to side to prevent your stencil from stretching. Working quickly helps you avoid having your chalk paste dry on top of your stencil instead of going through to your surface.
- Wash your stencil with water, place it adhesive side up on a towel to air dry, and when dry, return it to the backer sheet. If paste stains the teal portion of your stencil, that is perfectly fine, but ensure that paste is cleaned out of the silk screen portion of your stencil so you can reuse it many times.
- Let your project dry, embellish if you wish, display and enjoy!
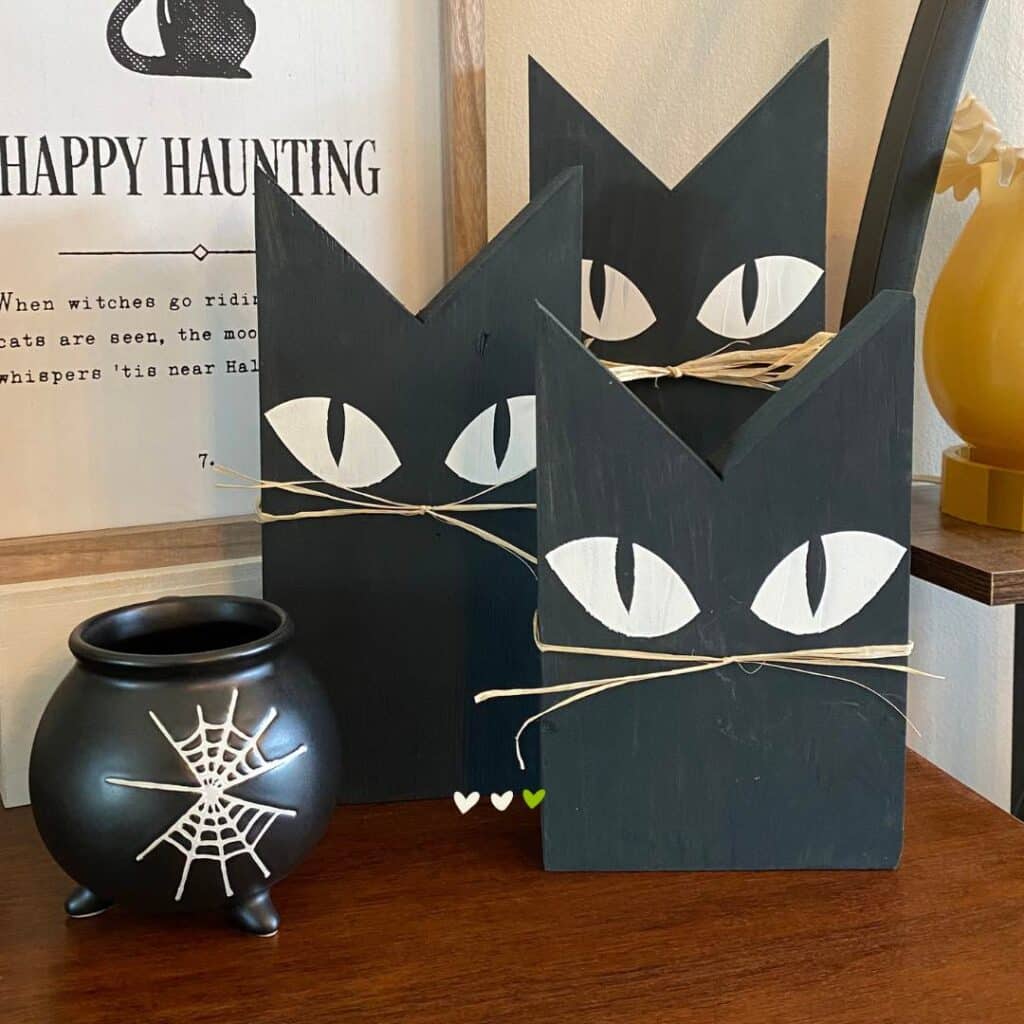
Wooden Black Cats
Who doesn’t love a black cat for Halloween? For this project, our resident carpenter cut pieces of wood in the shape of a simple cat but read on to see what other options you can use if you don’t have the right tools to cut wood.
Supplies required:
- A surface cut in the shape of a simple cat; basically a rectangle with a v-shaped notch cut into the top to create ears. For this project, we used wood, but you could also use cardboard, cardstock, felt or thin craft wood that can be cut with an Xacto knife or a cutting machine.
- If your material isn’t black, you’ll need black paint for the body; you can use craft paint or any type of paint you wish.
- White paint or chalk paste for the eyes.
- A stencil for the eyes, either one you find at a craft store or cut with a cutting machine, or a reference photo to use if painting the eyes by hand.
- A squeegee if using a stencil and chalk paste or a paint brush if painting on your eyes.
- Raffia and scissors to create the whiskers.
Project steps:
- Cut your chosen surface material into a simple cat by cutting a rectangle in the size of your choice and then cut a v-shaped notch at the top to create the ears. The photo below shows examples of an 8″, 10″ and 12″ cat.
- If your surface isn’t black, paint your surface with your chosen paint and let dry.
- Cut and position your stencil for the eyes, or decide where you’d like to paint them on. For this project, vinyl stencils were cut using a pattern and a cutting machine.
- Chalk or paint your eyes using white paste/paint.
- Cut a piece of raffia to tie around your cat to create the whiskers.
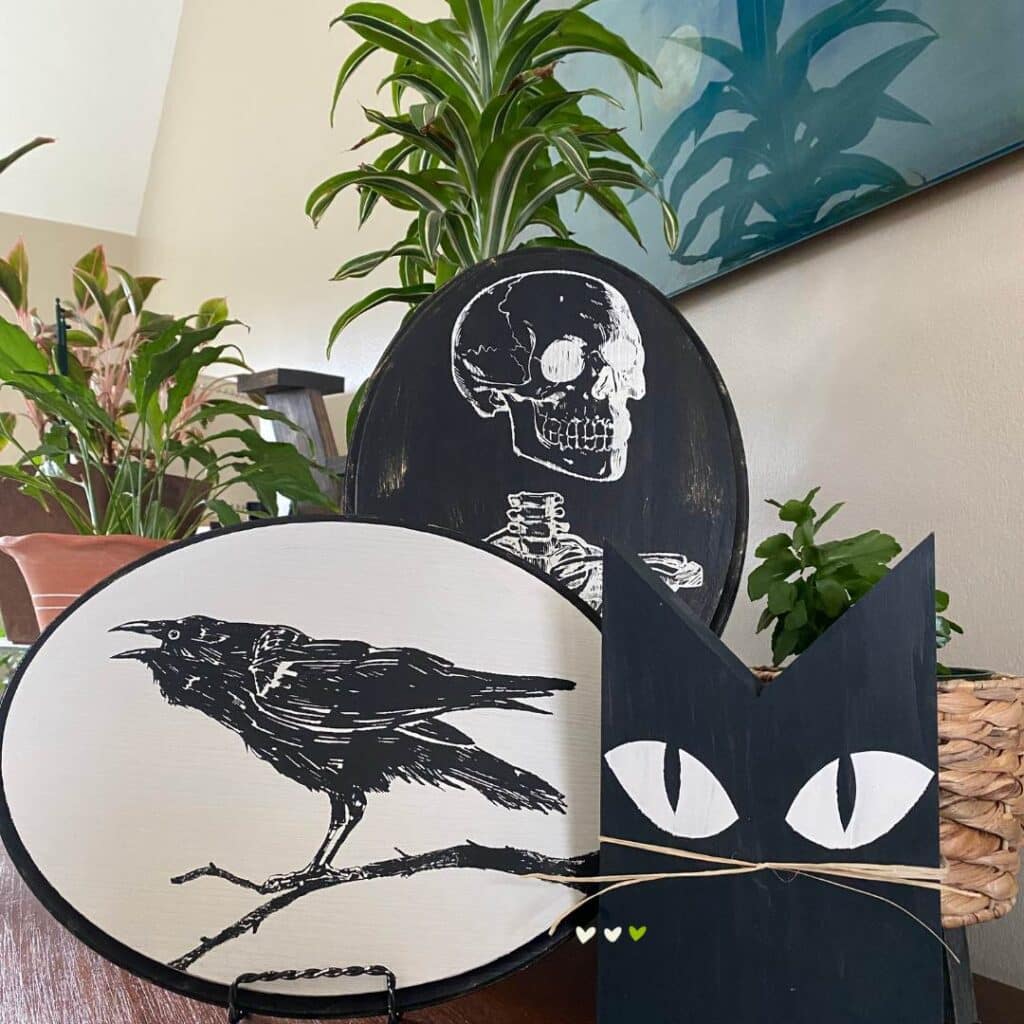
Black and White Ovals
By using simple oval shapes from a craft store, some paint, stencils and chalk paste, you can create some decor items that are simple but have a big impact! The crow and skeleton examples below are sure to fit in nicely with any Halloween decor.
Supplies required:
- Wood oval shapes from a craft store, although you can choose any shapes your like.
- Black and white paint to paint the ovals, or use any colors of your choice. For these projects, chalk paint in black and cottage white were used.
- The Skeleton Key stencil which includes so many great elements to use for Halloween decor.
- A stencil for the branch under the crow or a reference picture if you want to paint it freehand. For this project, a branch from another stencil was used to get the basic shape and then the branch was finished by hand painting.
- White and black chalk paste or any colors of your choice.
- A squeegee.
- Surface wax and an applicator (optional).
Project steps:
- Paint your ovals in colors of your choice and let dry.
- Optional: apply a small amount of surface wax to your painted surface to protect your stencil.
- Choose which elements of the Skeleton Key stencil you’d like to use. The two examples below use the skeleton and the crow.
- Fuzz your stencil pieces. See previous project for more details on this step.
- Position your stencil on your surface and smooth it out. Make sure there are no bubbles in the silk screen portion of the stencil as that may cause the paste to bleed.
- Apply a small amount of paste to your squeegee and spread it over the silk screen of the stencil. Working in one direction creates the best results, so spread your paste up and down or side to side. Scrape off any excess paste and return it to your jar.
- Working fairly quickly, peel up your stencil after you have scraped off any excess paste. Peel from top to bottom or side to side to prevent your stencil from stretching. Working quickly helps you avoid having your chalk paste dry on top of your stencil instead of going through to your surface.
- Wash your stencil with water, place it adhesive side up on a towel to air dry and return it to the backer sheet when dry.
- Add any details, like the branch under the crow, or other embellishments you’d like.
- Display and enjoy!
A spooky coffin
A coffin is such a fun element to add to Halloween decor. Our resident carpenter cut this coffin out of wood, but we’ll also talk about other options you can use!
Supplies required:
- A surface cut in the shape of a coffin. For this project, we used wood, but you could also use cardboard, cardstock, felt or thin craft wood that can be cut with an Xacto knife or a cutting machine.
- If your material isn’t black, grab some black paint; you can use craft paint or any type of paint you wish.
- A stencil with a design or saying you like. For this project, a retired Chalk Couture stencil was used with a funny saying and a skeleton hand.
- White chalk paste.
- A squeegee.
- A paintbrush.
Project steps:
- Cut your chosen surface material into a coffin shape.
- If your surface isn’t black, paint it with your black paint and let dry.
- Fuzz your stencil (see project above for more details on this step).
- Position your stencil on your surface and smooth it out. Make sure there are no bubbles in the silk screen portion of the stencil as that may cause the paste to bleed.
- Apply a small amount of paste to your squeegee and spread it over the silk screen of the stencil. Working in one direction creates the best results, so spread your paste up and down or side to side. Scrape off any excess paste and return it to your jar.
- Working fairly quickly, peel up your stencil after you have scraped off any excess paste. Peel from top to bottom or side to side to prevent your stencil from stretching. Working quickly helps you avoid having your chalk paste dry on top of your stencil instead of going through to your surface.
- Wash your stencil with water, place it adhesive side up on a towel to air dry and return it to the backer sheet when dry.
- Let your project dry, embellish if you wish, display and enjoy!

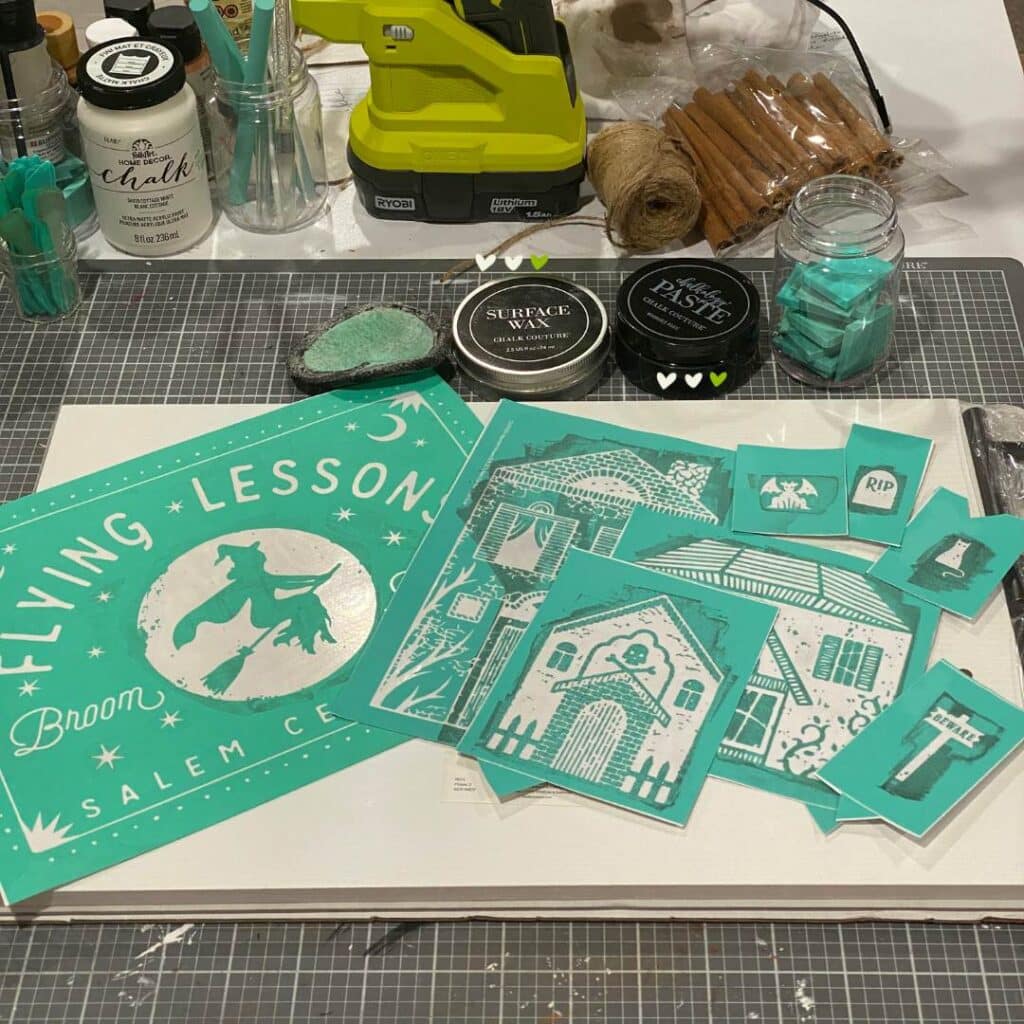
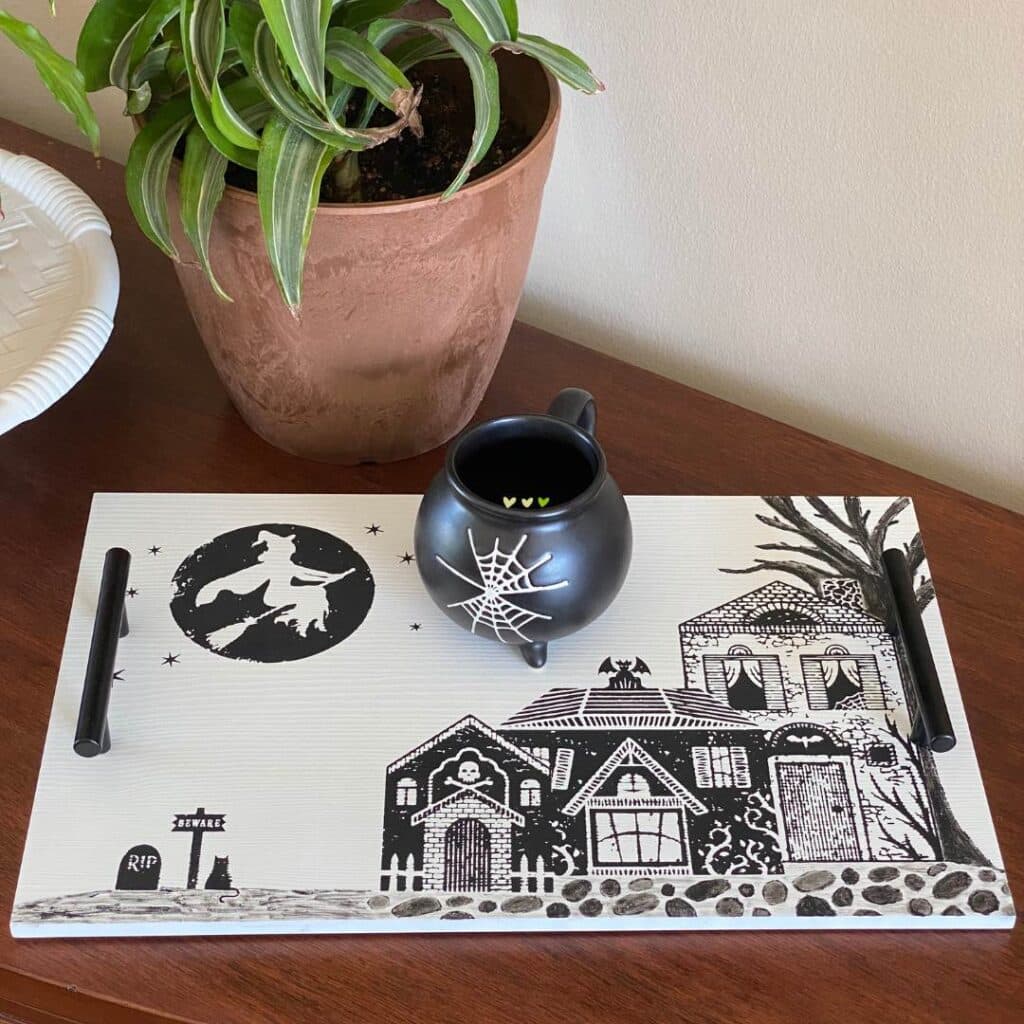
A Tray with a Halloween Scene
A tray is a great addition to your decor. It can be used in a variety of ways including standing on its edge on a shelf or laying flat on a table. It can be a centerpiece with flowers or candles or a place to collect and display other pieces of decor.
Supplies required:
- A Chalk Couture Rectangle Serving Tray or any tray of your choice.
- Stencils of your choice. For this project, retired stencils were used for the witch and the spooky houses.
- Chalk Couture Black Velvet Chalkology Paste or any colors of your choice.
- A squeegee.
- Surface wax and applicator (optional).
- A paint brush for the elements added by painting freehand.
- A drying tool or hair dryer (optional).
Project steps:
- Choose the placement of your stencils.
- Fuzz your stencils. See previous project for details of this step.
- Optional: Apply surface wax to the portions of the tray where your stencils will be placed. Although this step is optional, this Chalk Couture Tray has ridges, and the wax will help fill in those ridges for a smoother application.
- Position your stencils on your tray and smooth them out. You want to ensure there are no bubbles in the silk screen portion of the stencil as that may cause the paste to bleed.
- Apply a small amount of paste to your squeegee and spread it over the silk screen of the stencil. Working in one direction creates the best results, so spread your paste up and down or side to side. Scrape off any excess paste and return it to your jar.
- Working fairly quickly, peel up your stencil after you have scraped off any excess paste. Peel from top to bottom or side to side to prevent your stencil from stretching. Working quickly helps you avoid having your chalk paste dry on top of your stencil instead of going through to your surface.
- Optional: Dry your stenciled design with a drying tool or hair dryer. This step can help keep the paste from bleeding into any ridges in the tray. If you look closely at the photos of the example, you can see the black paste did bleed into the ridges of the tray in some areas. For Halloween, this adds to the creepy, spooky vibe, so it was a welcome effect.
- Continue adding your stencil elements until your scene takes shape. In this example, the witch was stenciled on first, followed by the houses (the one in front first, then the next so it looks like its overlapping, and then the third.)
Pro Tip: To create the layering effect, position a piece of the stencil backer over the element in front so you don’t chalk over it, or you can also use painter’s tape to cover that element.
If using painter’s tape, you could apply a thin coat of wax over the design to protect the chalk paste from peeling up when the tape is removed.
- Paint in any other elements with a paint brush and chalk paste. For this project, the spooky tree, and foreground elements like the cobblestone path, were painted by hand.
- Wash your stencil with water, place it adhesive side up on a towel to air dry and return to the backer sheet when dry.
- Let your project dry, embellish if you wish, display and enjoy!
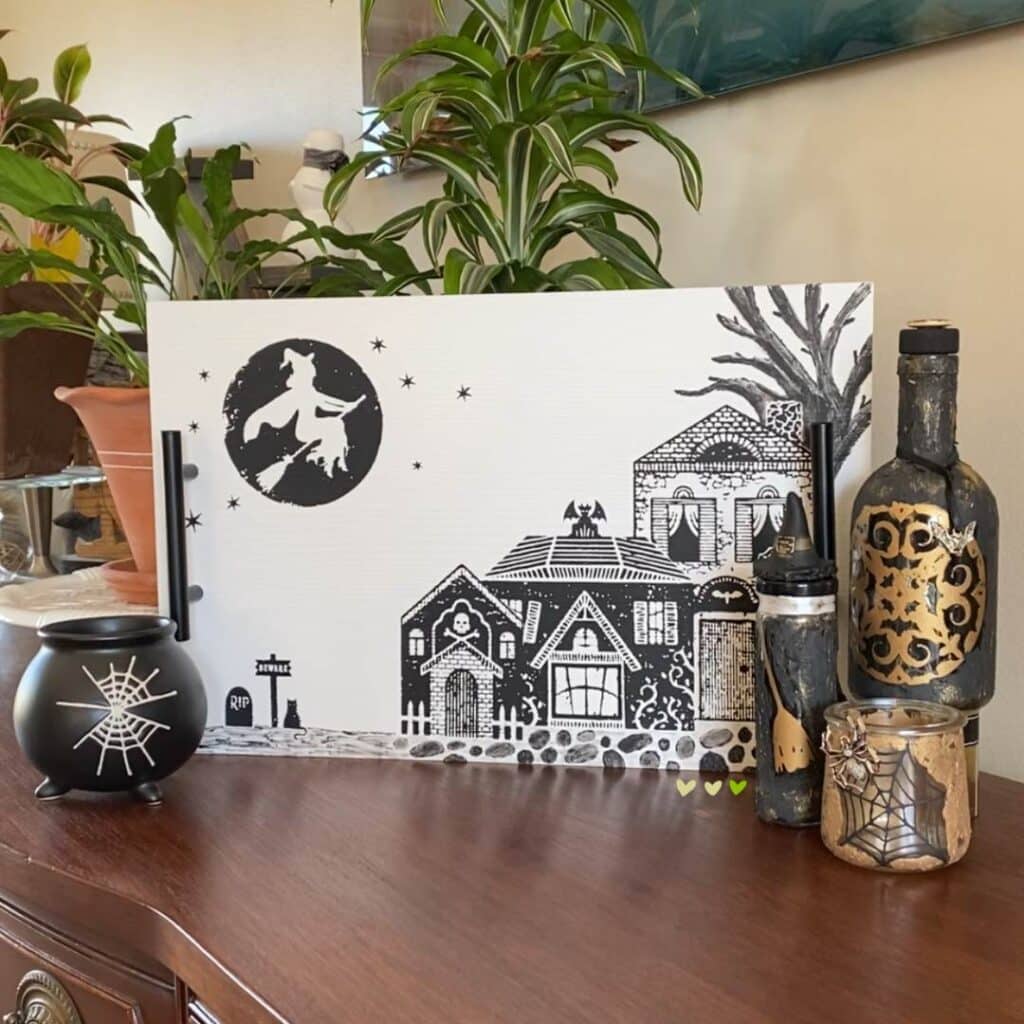
You can see from the various photos, all of these black and white projects work well together! You can mix and match, place them in different places around your home and incorporate other black and white pieces you already own. The cup that looks like a cauldron, the apothecary jars and the silver disco spider add little touches of dimension and texture that are so welcome in a display!
All of the projects were gathered together for one big black and white “theme it up for Halloween” photo! Which one do you like best?

I hope these projects gave you some ideas and inspired you! If you consider a theme it up for Halloween approach to your decor this year, consider selecting something that is meaningful to you. Think about your interests, hobbies, or favorite movies which can give you great ideas for a theme. Use these ideas to create a space that is both festive and reflects your unique personality!
If you aren’t up for a theme it up for Halloween display, go with what you love! Mixing things up is also a ton of fun, and you really can’t go wrong by using things you love and enjoy seeing to decorate your home!
I can’t wait to see what you create!
Sustainably yours,
Luana